Wednesday, October 30, 2024

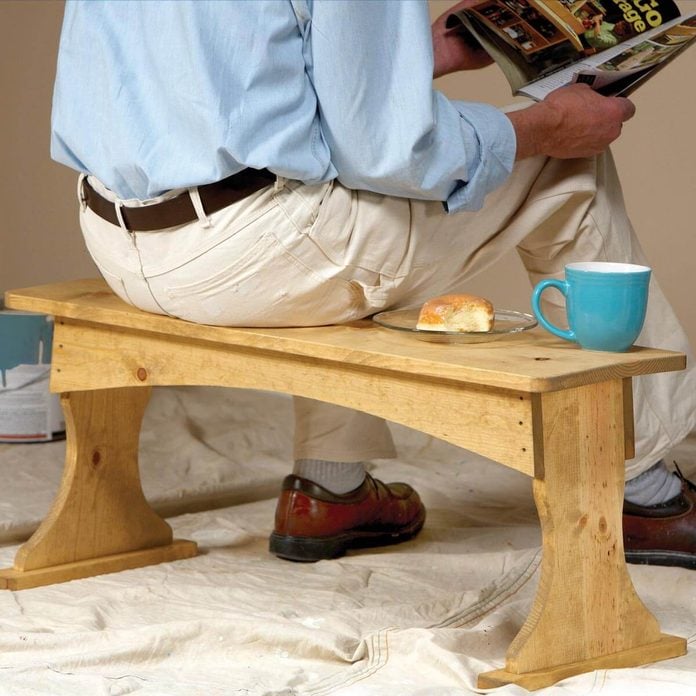
Quick and Easy Beginner Woodworking Ideas to Try at Home

Quick and Easy Beginner Woodworking Ideas to Try at Home

Quick and Easy Beginner Woodworking Ideas to Try at Home

Hey there, fellow woodworkers! Ever dreamed of crafting your own beautiful furniture or home décor? Maybe you just want to create something unique and feel a sense of accomplishment. Well, guess what? You don't need years of experience or a fancy workshop to get started! We're going to dive into some awesome, quick, and easy beginner woodworking projects that you can tackle right at home. So, grab your safety glasses, dust off those tools, and let's get crafting!

Simple and Satisfying Projects

The best way to start is with projects that are simple, manageable, and let you learn the basics without feeling overwhelmed. Here are a few ideas that are perfect for beginners:

1. Coasters

Coasters are an excellent starting point because they're small, relatively quick to make, and you can experiment with different shapes, sizes, and finishes. Plus, they're super practical for protecting your furniture! You can use scraps of wood, plywood, or even old tiles to create coasters.

Here's what you'll need:

  • Wood (scraps or pre-cut pieces)
  • Saw (hand saw or jigsaw)
  • Sandpaper (various grits)
  • Wood glue
  • Finishing oil or sealant

Instructions:

  • Cut your wood into desired shapes and sizes.
  • Sand the edges and surfaces smooth.
  • Apply wood glue to the bottom of each coaster to create a protective layer (optional).
  • Finish with oil or sealant for a durable and water-resistant surface.

2. Cutting Boards

A cutting board is another classic beginner project, and you can make it as simple or intricate as you like. You can choose from hardwoods like maple or cherry, or experiment with softwoods like pine. Just remember to select wood that's food-safe and free of any harsh chemicals.

Here's what you'll need:

  • Wood (hardwood or softwood)
  • Saw (table saw or jigsaw)
  • Sandpaper (various grits)
  • Wood glue
  • Mineral oil or butcher block conditioner

Instructions:

  • Cut your wood to the desired size and shape.
  • Sand the edges and surface smooth.
  • Round the corners for safety.
  • Apply mineral oil or butcher block conditioner to protect the wood and make it water-resistant.

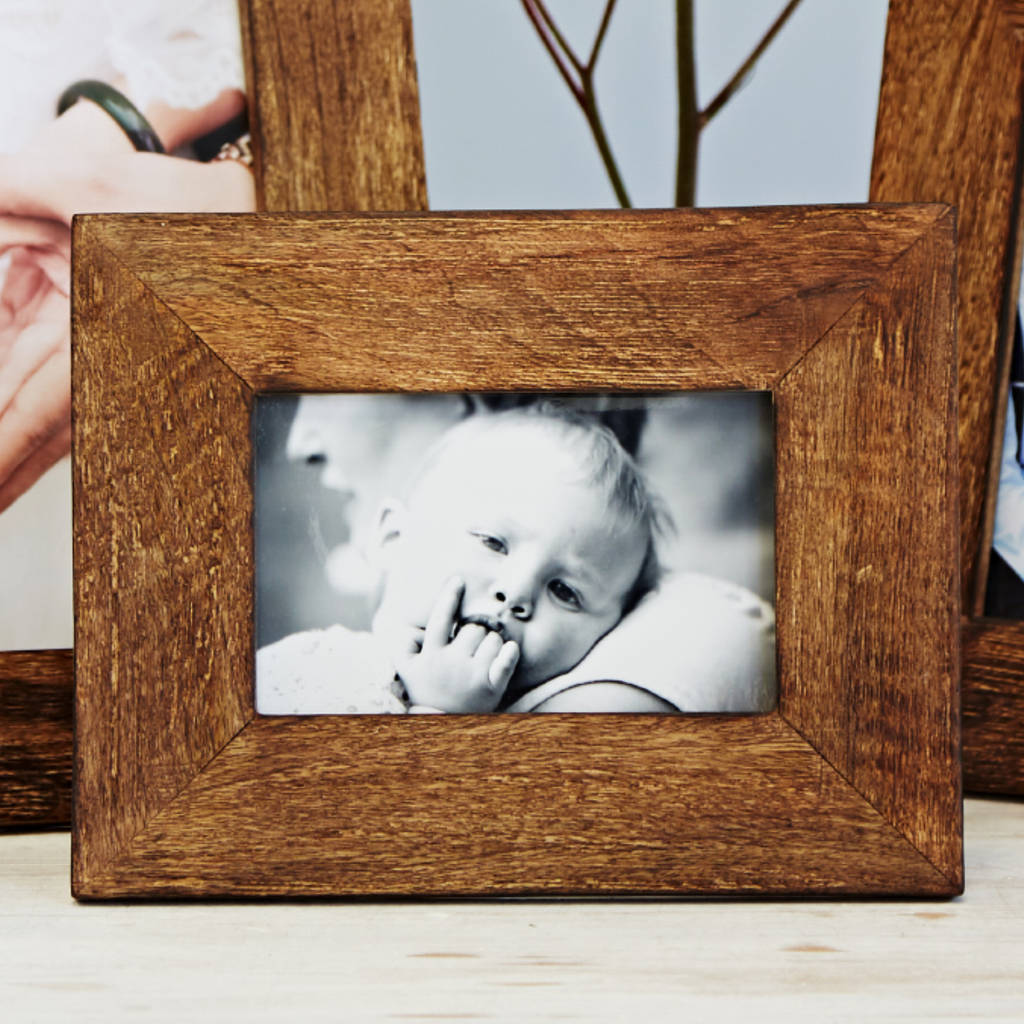
3. Picture Frames

Who doesn't love a good picture frame? You can create custom frames for your favorite photographs or artwork using wood, plywood, or even reclaimed materials. Get creative with the design! You can add decorative elements like moldings, paint, or even decoupage.

Here's what you'll need:

  • Wood or plywood (scraps or pre-cut pieces)
  • Saw (hand saw or jigsaw)
  • Sandpaper (various grits)
  • Miter saw or miter box (for clean angles)
  • Wood glue
  • Finishing nails or brads
  • Paint or stain (optional)

Instructions:

  • Cut your wood pieces to size, ensuring accurate angles for the frame.
  • Sand the edges and surfaces smooth.
  • Join the frame pieces using wood glue and finishing nails or brads.
  • Finish with paint, stain, or sealant as desired.

4. Simple Shelves

Want to add some extra storage space? Shelves are a great beginner project, and you can make them in different styles and sizes to suit your needs. Think about building floating shelves, corner shelves, or even bookshelf units. Start with basic rectangular shelves and work your way up to more complex designs as you gain confidence.

Here's what you'll need:

  • Wood (lumber or plywood)
  • Saw (circular saw or jigsaw)
  • Sandpaper (various grits)
  • Wood glue
  • Screws or nails
  • Brackets or supports (if needed)

Instructions:

  • Cut your wood to the desired size for the shelves and supports.
  • Sand all surfaces smooth.
  • Attach the shelves to the supports using wood glue and screws or nails.
  • Install the shelves to the wall using brackets or supports as needed.

Essential Beginner Woodworking Tools

Now that you've got some project ideas, let's talk about the tools you'll need to get started. Don't worry, you don't have to invest in a whole workshop right away. You can build a solid tool collection gradually.

  • Measuring Tape: Accurate measurements are crucial for woodworking. Get a tape measure with a clear markings and a sturdy hook.
  • Pencil: You'll be marking your wood a lot, so choose a pencil that's easy to grip and leaves a clear line.
  • Saw: For beginner projects, a hand saw or jigsaw is sufficient. A jigsaw allows for more intricate cuts.
  • Sandpaper: Essential for smoothing and finishing your wood projects. Start with a coarser grit for initial sanding and then move to finer grits for a smooth finish.
  • Wood Glue: A must-have for bonding wood pieces together. Choose a wood glue that dries clear and is strong.
  • Clamps: To hold pieces together while the glue dries. You can start with a few bar clamps and add more as needed.
  • Hammer: For driving nails and securing your projects.
  • Screwdriver: Choose a set with different sizes and types of screwdrivers to handle various screws.
  • Safety Glasses: Crucial for protecting your eyes from flying debris.

Safety First

Before you start crafting, it's essential to prioritize safety. Woodworking can be enjoyable, but it's important to be aware of potential hazards. Here are some safety tips:

  • Wear Safety Glasses: Always wear safety glasses to protect your eyes from flying debris.
  • Use Sharp Tools: Sharp tools are less likely to slip and cause injuries. Keep your blades sharp and in good condition.
  • Secure Your Workpiece: Make sure your workpiece is securely clamped before cutting or sanding to prevent it from moving.
  • Keep Work Area Clean: A cluttered workspace is a hazard. Clear away any debris and clutter before and after each project.
  • Don't Work When Tired: Fatigue can lead to mistakes and accidents. Don't work with tools if you're tired or feeling drowsy.
  • Follow Tool Instructions: Always read and understand the instructions for your tools before using them.
  • Be Aware of Surroundings: Pay attention to your surroundings to avoid tripping hazards or accidental bumps.
  • Use Protective Gear: Consider using gloves, ear protection, and a dust mask when necessary.

Tips for Success

Here are some helpful tips to make your beginner woodworking journey more enjoyable and successful:

  • Start Small: Choose projects that are manageable in size and complexity. You can always tackle larger or more challenging projects as you gain experience.
  • Practice Makes Perfect: Don't be afraid to practice your cutting, sanding, and finishing techniques. The more you practice, the better you'll get.
  • Take Your Time: Rushing through a project can lead to mistakes. Take your time and focus on doing each step carefully and accurately.
  • Ask for Help: If you encounter a problem or need guidance, don't hesitate to ask for help from a more experienced woodworker. There are also plenty of online resources and woodworking communities where you can find support.
  • Be Patient: Woodworking is a skill that takes time and practice to develop. Don't get discouraged if your first projects aren't perfect. Just keep practicing and learning, and you'll be amazed at how much progress you make.

Commonly Asked Questions

Here are some frequently asked questions about beginner woodworking:

1. What kind of wood should I use for my first projects?

For your first projects, you can use softwoods like pine or fir. They are easier to work with and more forgiving of beginner mistakes. As you gain experience, you can experiment with hardwoods like maple, oak, or cherry.

2. Do I need a fancy workshop to start woodworking?

Not at all! You can start woodworking in a garage, basement, or even a small corner of your house. All you need is a safe workspace and basic tools.

3. What are the best resources for learning woodworking?

There are tons of online resources available, including woodworking blogs, YouTube channels, and websites with step-by-step tutorials. You can also check out books from your local library.

So, there you have it! A whole world of woodworking awaits, and you've got everything you need to get started. Embrace the process, enjoy the learning curve, and most importantly, have fun! Happy crafting!
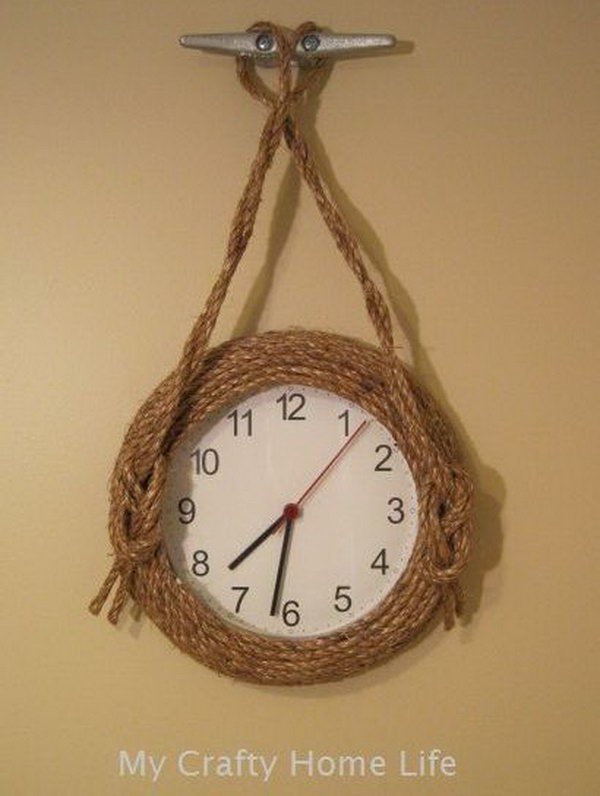
How to Make Wooden Wall Clocks with a Nautical or Coastal Theme

How to Make Wooden Wall Clocks with a Nautical or Coastal Theme

Crafting Nautical and Coastal-Themed Wooden Wall Clocks

Embark on a creative journey to craft exquisite wooden wall clocks that exude the charm of the nautical and coastal life. These timepieces, crafted with your own hands, will not only adorn your home but also serve as a cherished reminder of your love for the sea. This comprehensive guide will equip you with the necessary knowledge and techniques to embark on this rewarding endeavor.

Choosing the Right Wood

The choice of wood is crucial for both aesthetic appeal and durability. Opt for woods known for their strength, stability, and suitability for carving and finishing. Here are some excellent options:

  • Mahogany: This classic wood offers a rich reddish-brown hue and natural beauty, enhancing the nautical theme.
  • Walnut: With its deep brown color and intricate grain patterns, walnut provides a sophisticated and elegant touch.
  • Oak: Known for its durability and robust character, oak is ideal for rustic coastal designs.
  • Cherry: Its warm reddish-brown tones and smooth finish create a timeless and sophisticated look.
  • Pine: This lightweight wood is easily workable and cost-effective, perfect for beginners.

Design Considerations

Before embarking on the construction, it's essential to conceptualize the design of your nautical or coastal wall clock. Consider the following aspects:

Theme and Style

  • Nautical: Incorporate elements like ship wheels, anchors, ropes, seashells, or compass roses.
  • Coastal: Explore beach-inspired designs featuring seashells, driftwood, lighthouses, or seagulls.
  • Rustic: Emphasize natural wood textures and finishes, with a focus on weathered elements.
  • Modern: Utilize clean lines, geometric shapes, and contemporary color palettes.

Clock Face Design

  • Traditional Roman Numerals: These classic numerals add a touch of elegance and timelessness.
  • Arabic Numerals: Modern and easy to read, Arabic numerals are a versatile choice.
  • Custom Designs: Get creative with unique designs using stencils, stamps, or even woodburning.

Color Palette

  • Blue and White: Evokes the serenity of the ocean and sky.
  • Red, White, and Blue: Celebrates the colors of the American flag.
  • Earthy Tones: Natural hues like browns, greens, and beiges complement coastal themes.
  • Black and White: Creates a striking contrast for a modern or minimalist look.

Tools and Materials

To craft a beautiful wooden wall clock, you'll need the following tools and materials:

  • Wood: Choose your desired wood type and thickness.
  • Saw: A table saw, circular saw, or hand saw for cutting the wood to size.
  • Drill: For creating holes for the clock mechanism and hands.
  • Sandpaper: Various grits for smoothing the wood and creating a polished finish.
  • Clock Mechanism: Includes the movement, hands, and mounting hardware.
  • Wood Glue: For securing the clock face and other components.
  • Wood Stain or Paint: To achieve your desired color and finish.
  • Polyurethane or Wax: For sealing and protecting the wood.
  • Clamps: To hold pieces together during assembly.
  • Measuring Tape: For accurate dimensions and layout.
  • Pencil: For marking and transferring designs.

Construction Steps

Now, let's dive into the step-by-step process of crafting your wooden wall clock:

1. Cutting the Wood

  • Measure and cut the wood for the clock face and any additional components like a frame or decorative elements.
  • Use a saw and a straight edge to ensure precise cuts.
  • Sand the edges to remove any rough spots.

2. Creating the Clock Face

  • If desired, use a stencil or woodburning tool to create a design on the clock face.
  • If using numerals, carefully mark their placement with a pencil.
  • Use a drill and a drill bit slightly smaller than the size of the clock mechanism to create a central hole for mounting.

3. Assembling the Clock

  • If building a frame, assemble it using wood glue and clamps.
  • Once the glue is dry, attach the clock face to the frame or the wood base.
  • Mount the clock mechanism from the back, ensuring the hands align correctly.

4. Finishing and Sealing

  • Sand the entire clock thoroughly to achieve a smooth surface.
  • Apply your chosen wood stain or paint, following the manufacturer's instructions.
  • After the stain or paint dries, apply a sealant like polyurethane or wax for protection.

Adding Nautical and Coastal Details

To elevate your wooden wall clock to a true nautical or coastal masterpiece, incorporate these decorative elements:

  • Carve or Cut Out Nautical Motifs: Anchors, compass roses, seashells, or even a small ship silhouette.
  • Incorporate Rope or Twine: Use rope to create a decorative border around the clock face or as a hanging strap.
  • Add Seashells: Glue seashells around the clock face or on the frame for a beachy touch.
  • Use Driftwood: Incorporate pieces of driftwood for a rustic coastal look.
  • Create a Miniature Lighthouse: Craft a small wooden lighthouse and place it near the clock face.

Unique Ideas for Nautical and Coastal Clocks

Let your creativity flow with these unique ideas:

  • Ship Wheel Clock: Create a clock face resembling a ship's wheel, using wooden spokes and a central hub.
  • Compass Rose Clock: Incorporate a compass rose design into the clock face, representing navigation and exploration.
  • Lighthouse Clock: Design a clock face resembling a lighthouse, using a tall, slender shape and a lantern on top.
  • Seashell Clock: Arrange seashells around the clock face to create a unique and natural design.
  • Driftwood Clock: Use pieces of driftwood to form the clock face and frame, incorporating natural beauty.

Conclusion

Crafting a nautical or coastal-themed wooden wall clock is a rewarding experience that allows you to express your creativity and create a truly unique and personal timepiece. With careful planning, attention to detail, and a passion for the sea, you can transform your woodworking skills into a beautiful and cherished piece of art. Your home will be graced with a distinctive reminder of the beauty and charm of the nautical and coastal life.

Friday, October 25, 2024

How to Build Floating Shelves That Are Functional and Stylish

How to Build Floating Shelves That Are Functional and Stylish

Building Functional and Stylish Floating Shelves

Floating shelves offer a sleek and modern aesthetic while maximizing space in any room. They're perfect for showcasing your favorite books, plants, or decorative items. However, building floating shelves doesn't have to be a daunting task. This guide will equip you with the necessary knowledge and steps to create functional and stylish shelves that enhance your home's interior.

Planning Your Floating Shelves

Before diving into the construction, take some time to plan your shelves. This crucial step ensures your shelves fit your needs and style.

Determine the Location and Size

Select the wall where you want to install your shelves. Consider the purpose of the shelves, the existing décor, and the available space. Measure the desired width and depth of your shelves. Remember that floating shelves typically have a shallower depth than traditional shelves, so choose a size that accommodates your items.

Choose Materials

Wood is a popular choice for floating shelves due to its versatility, durability, and aesthetic appeal. Consider using hardwood like oak, maple, or walnut for a luxurious look or opt for pine or plywood for a more budget-friendly option.

Decide on the Style

Do you prefer a minimalist look with clean lines or a more rustic aesthetic? Determine the desired style to guide your material selection and design. Consider adding decorative elements like molding or trim for a more intricate look.

Materials and Tools

Once your plan is finalized, gather the following materials and tools:

  • Wood planks (based on your desired dimensions)
  • Wood stain or paint
  • Finishing oil or sealant (optional)
  • Screws (for attaching shelves to the wall)
  • Wall anchors (if necessary)
  • Stud finder
  • Tape measure
  • Level
  • Saw (to cut wood if needed)
  • Drill
  • Sandpaper
  • Pencil

Building the Floating Shelves

Now, it's time to bring your vision to life. Follow these steps to construct your shelves:

Cut the Wood

Using your saw, cut the wood planks to the desired size and length. Ensure clean and precise cuts for a professional look.

Sand the Wood

Smooth out any rough edges or imperfections with sandpaper. Sanding provides a smooth surface for staining or painting.

Stain or Paint the Wood

Apply your chosen stain or paint to the wood planks. Use a brush or roller for even application and allow the finish to dry completely.

Installation

With your shelves ready, you're one step away from enjoying their functional beauty.

Locate Studs

Use a stud finder to locate wall studs where you will mount your shelves. This ensures secure support.

Mark and Drill Pilot Holes

Using your pencil and level, mark the positions for your shelf supports on the wall. Drill pilot holes at the marked spots to prevent splitting the wood when driving screws.

Attach the Shelf Supports

Attach the shelf supports to the wall using screws. If you are not hitting a stud, use wall anchors for extra support.

Mount the Shelves

Carefully slide the shelves onto the supports, ensuring they are level.

Final Touches

To enhance your shelves' durability and appearance, consider applying a finishing oil or sealant after installation. This step protects the wood from moisture and dirt, ensuring your shelves last longer.

Finally, arrange your favorite items on the shelves and admire your handiwork!

Creative Ideas for Stylish Floating Shelves

Enhance the style of your floating shelves with creative touches.

  • Accent lighting: Add LED strip lights underneath the shelves for a modern and captivating effect.
  • Wallpaper or fabric backing: Instead of plain wood, cover the back of the shelves with wallpaper or fabric for a personalized and artistic touch.
  • Floating shelves of different sizes and shapes: Create visual interest by using shelves of varying widths and shapes to break up the monotony.

By following these steps and incorporating creative ideas, you can build functional and stylish floating shelves that elevate your home's interior while showcasing your treasured possessions.

Thursday, October 24, 2024

Pencil Holder Projects That Will Organize Your Workspace in Style

Pencil Holder Projects That Will Organize Your Workspace in Style

Pencil Holder Projects That Will Organize Your Workspace in Style

A cluttered workspace can be a major distraction and hinder your productivity. A simple pencil holder can transform your desk from chaotic to organized in a flash. But why settle for boring, generic holders when you can create something truly unique and stylish? Let's dive into some pencil holder projects that will add a touch of personality to your workspace while keeping your pens, pencils, and other desk essentials in check.

Upcycled Pencil Holders

Give new life to old items and add a touch of vintage charm to your workspace. Upcycling is a fantastic way to create eco-friendly pencil holders and express your creativity.

Tin Cans

Gather those empty soup cans and let your imagination run wild. You can paint them in vibrant colors, cover them with decorative paper, or even use a decoupage technique for a unique, layered look. Add a handle or a fun embellishment for a personalized touch.

Glass Jars

Those empty jam jars, pickle jars, or even old mason jars can be transformed into elegant pencil holders. Clean them thoroughly, and then choose your design. Paint them with metallic hues for a sophisticated look, or use textured paint for a whimsical feel. A thin layer of glitter can also add some extra sparkle.

DIY Wooden Pencil Holders

Wood is a classic choice for pencil holders and offers a natural and rustic aesthetic. You can find pre-cut pieces of wood at your local craft store or even use leftover scraps from a woodworking project.

Simple Wooden Block

Start with a simple wooden block and drill holes of varying sizes to create a multi-functional pencil holder. You can stain the wood for a rich finish or leave it natural for a minimalist look.

Rustic Pallet Pencil Holder

Upcycle an old pallet by creating a vertical holder with several compartments. Simply cut out the desired shape and size of compartments. Sand the pallet for a smooth finish, and then stain or paint it to match your workspace décor.

Unique and Creative Pencil Holder Ideas

Think outside the box and use unconventional materials to create truly one-of-a-kind pencil holders.

Concrete Pencil Holder

For a modern and industrial look, try creating a concrete pencil holder. You can find inexpensive silicone molds online and mix your own concrete. Once the concrete has set, you can paint it, decorate it with stencils, or leave it with a raw, natural finish.

Pipe Pencil Holder

Pipe fittings offer a unique and industrial aesthetic. Find a selection of pipes and fittings at your local hardware store and assemble them to create a functional and stylish pencil holder.

Tips for Making Pencil Holders

Before you begin, consider these tips for a successful pencil holder project:

  • Choose materials that suit your style and workspace.
  • Ensure the holder is sturdy and able to hold the weight of your writing tools.
  • Consider the size and shape of your holder to fit your desk space and writing needs.
  • Don't be afraid to experiment with different materials and techniques.

With a little creativity and effort, you can create a pencil holder that perfectly complements your workspace and keeps your writing tools organized and within reach. So get those materials ready and let your artistic side shine!

Wednesday, October 23, 2024

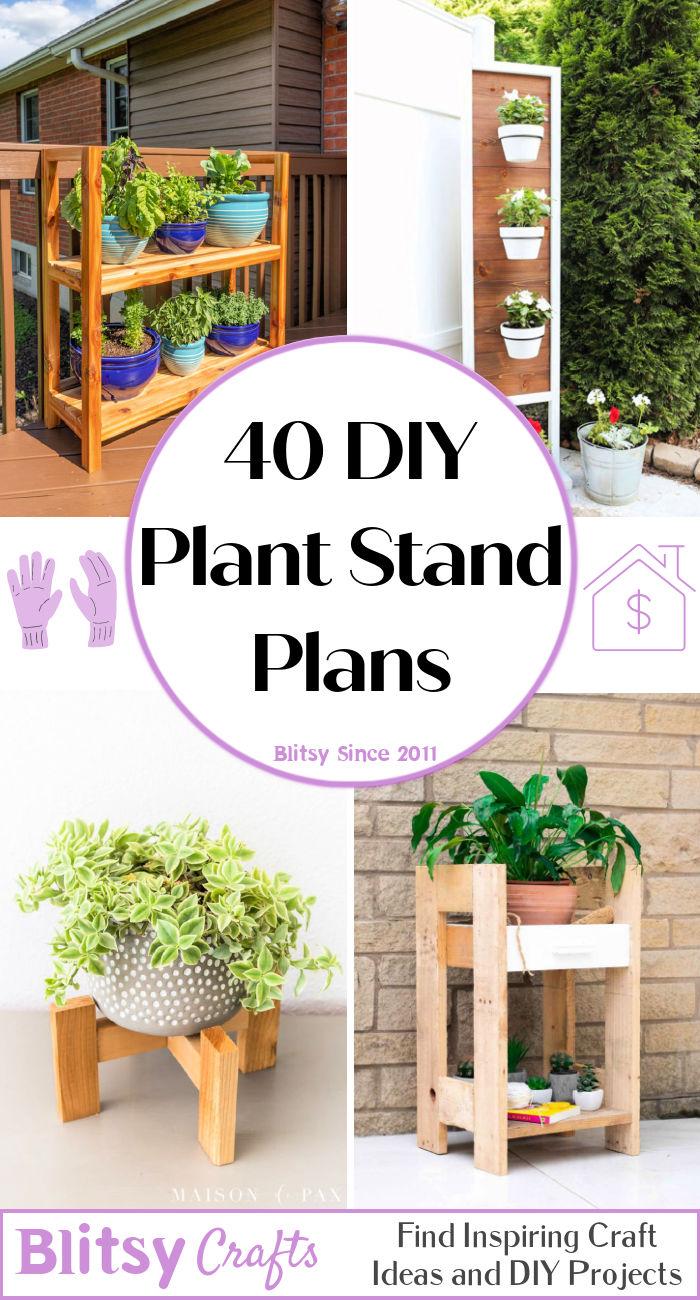
How to Build Custom Wooden Plant Stands for Extra Income

How to Build Custom Wooden Plant Stands for Extra Income

Crafting Custom Wooden Plant Stands for a Flourishing Side Hustle

In the realm of home decor and gardening, plant stands have emerged as a sought-after element, adding both functionality and aesthetic appeal to indoor and outdoor spaces. Recognizing this growing demand, aspiring entrepreneurs are discovering the lucrative opportunity to create custom wooden plant stands, catering to the diverse tastes and needs of plant enthusiasts. This article delves into the art and business of building custom wooden plant stands, providing a comprehensive guide to help you transform your woodworking skills into a profitable side hustle.

Understanding the Market Demand

The popularity of houseplants and gardening has surged in recent years, fueled by the desire for natural beauty, improved indoor air quality, and a connection with nature. This trend has translated into a thriving market for plant-related accessories, including plant stands. Customers seek unique and personalized designs that complement their existing decor, making custom wooden plant stands highly desirable.

Identifying Your Target Market

Before diving into production, it's essential to identify your target market. Consider the following factors:

  • Style preferences: Are you targeting minimalist, modern, rustic, or bohemian aesthetics?
  • Plant size and types: Will you focus on small succulents or larger, more substantial plants?
  • Budget: What price range are you aiming for?
  • Location: Are you targeting local customers or selling online to a wider audience?

Designing Your Plant Stands

Crafting custom wooden plant stands involves a blend of creativity and technical expertise. You'll need to consider the following design elements:

Functional Considerations

  • Stability: Ensure the stand is sturdy enough to support the weight of the plant and pot.
  • Dimensions: Determine the appropriate height and width based on the intended plant size and placement.
  • Material: Choose suitable wood types, considering durability, aesthetics, and budget.
  • Finish: Opt for a durable and attractive finish that complements the wood and overall design.

Aesthetic Considerations

  • Style: Reflect your target market's preferences in your design choices.
  • Shape: Experiment with geometric shapes, curves, or unique forms.
  • Color: Utilize wood stains, paints, or natural finishes to create desired visual effects.
  • Details: Incorporate decorative elements like carvings, inlays, or metal accents.

Crafting Your Plant Stands

Once you have a solid design in place, it's time to bring your vision to life. Here's a step-by-step guide to building custom wooden plant stands:

Materials and Tools

  • Wood: Select high-quality wood like oak, maple, walnut, or pine, depending on your design and budget.
  • Tools: Basic woodworking tools including a saw, drill, sander, measuring tape, and clamps.
  • Fasteners: Screws, nails, or wood glue for assembling the stand.
  • Finish: Wood stain, paint, varnish, or natural oils for protection and aesthetics.

Construction Process

  1. Cut and shape the wood: Based on your design, cut and shape the wood pieces to create the base, tiers, and any decorative elements.
  2. Assemble the stand: Join the individual pieces using screws, nails, or wood glue, ensuring secure and stable connections.
  3. Sand the surface: Smooth out any rough edges or imperfections for a polished look.
  4. Apply the finish: Choose your preferred finish and apply it evenly, allowing adequate drying time.

Marketing and Selling Your Plant Stands

With your handcrafted plant stands ready, it's time to reach your target market. Consider these marketing strategies:

Online Platforms

  • Etsy: An established marketplace for handmade and vintage goods, allowing you to reach a global audience.
  • Shopify: Create your own online store with customizable themes and payment processing.
  • Social Media: Utilize platforms like Instagram, Facebook, and Pinterest to showcase your creations and engage with potential customers.

Local Marketplaces

  • Craft fairs: Participate in local events to connect directly with customers and showcase your unique designs.
  • Farmers' markets: Find a niche in the growing popularity of gardening and plant-related products.
  • Local boutiques: Partner with shops that carry home decor and gardening items.

Pricing Strategies

When determining the price of your plant stands, consider the following factors:

  • Cost of materials: Factor in the price of wood, fasteners, finishes, and any other supplies.
  • Time invested: Account for the hours spent on design, construction, and finishing.
  • Market competition: Research prices of similar plant stands to ensure competitive pricing.
  • Profit margin: Set a price that allows for a reasonable profit and covers your expenses.

Tips for Success

As you embark on your journey as a custom wooden plant stand builder, consider these tips for success:

  • Continuous learning: Stay updated on woodworking techniques, design trends, and market demands.
  • Customer feedback: Seek feedback from customers to improve your designs and products.
  • High-quality photos: Capture professional photos of your plant stands to showcase their beauty and craftsmanship.
  • Build your brand: Develop a consistent brand identity and message to stand out in the market.
  • Excellent customer service: Respond promptly to inquiries, address customer concerns, and ensure a positive buying experience.

Building custom wooden plant stands can be a rewarding and profitable side hustle, allowing you to unleash your creativity and connect with a passionate market. By understanding the market, mastering the craft, and implementing effective marketing strategies, you can create a thriving business that brings beauty to homes and spaces while growing your income.

Tuesday, October 22, 2024

Unique Wood Picture Frames That Sell Well

Unique Wood Picture Frames That Sell Well

Unique Wood Picture Frames That Sell Well

In the world of home décor, picture frames hold a special place, serving as both functional and decorative elements. While traditional frames have their charm, there is a growing demand for unique and eye-catching designs. This is where wood picture frames, with their inherent beauty and versatility, come into play. By embracing innovative techniques and incorporating unexpected materials, you can craft wood frames that not only showcase precious memories but also elevate the aesthetic appeal of any space.

Beyond the standard rectangular shape, there's a vast world of possibilities waiting to be explored. Consider venturing into geometric patterns, circular forms, or even whimsical silhouettes that capture the essence of your artistic vision. Experiment with various wood species, each offering a unique texture and color palette. The right wood can add depth and character, transforming a simple frame into a statement piece.

Remember, a successful picture frame is more than just a border. It's an opportunity to tell a story, to evoke emotions, and to reflect the personality of the art it encases. So, let's delve into the captivating world of unique wood picture frames and discover what makes them truly stand out in the market.

The Allure of Wood Picture Frames

Wood picture frames possess an undeniable allure, captivating consumers with their timeless elegance and natural beauty. Their inherent warmth and texture create a sense of authenticity and sophistication that complements a wide range of interior styles. But beyond aesthetics, wood frames offer several practical advantages:

Durability and Longevity

Wood is renowned for its strength and resilience, ensuring that your frames withstand the test of time. Well-crafted wood frames can last for generations, becoming cherished heirlooms that pass down through families. This durability translates into a long-lasting investment for both you and your customers.

Versatility and Adaptability

Wood's versatility allows for an endless array of design possibilities. From rustic farmhouse to sleek modern, the right wood species and finish can seamlessly blend with any decor theme. Furthermore, wood frames can be easily customized to suit individual preferences, allowing for personalized touches that add a unique flair to any space.

Sustainability and Eco-Consciousness

In today's environmentally conscious world, consumers are increasingly drawn to sustainable products. Wood, a renewable resource, aligns with this trend, offering a responsible and eco-friendly choice for picture frames. By choosing wood frames, you contribute to responsible forest management and reduce your carbon footprint.

Unique Designs that Captivate the Eye

To make your wood picture frames truly stand out, you need to go beyond the conventional. Here are some innovative design elements that can captivate customers and drive sales:

Geometric Patterns

Geometric patterns add a contemporary edge to traditional wood frames. Think angular lines, sharp corners, and bold shapes that create a visually striking contrast. You can experiment with various geometric forms, from simple triangles and squares to more intricate tessellations. These patterns can be achieved through laser cutting, wood carving, or even inlay techniques.

Circular and Oval Frames

Step away from the standard rectangular format and embrace the fluidity of circular and oval frames. These shapes create a softer, more inviting aesthetic, adding a touch of elegance to any room. Circular frames are particularly well-suited for portraits, while oval frames can beautifully accentuate landscapes or still life compositions.

Whimsical Silhouettes

For a truly unique approach, consider incorporating whimsical silhouettes into your frame designs. These can range from playful animal shapes to abstract forms inspired by nature. Silhouettes add a touch of whimsy and personality, making your frames stand out from the crowd. You can achieve these effects using laser cutting, hand carving, or even stenciling techniques.

Mixed Media and Inlay Techniques

Combine wood with other materials to create truly captivating frames. Incorporate metal accents, glass elements, or even natural materials like stones or shells. Inlay techniques, where different materials are embedded into the wood, can create stunning visual effects, adding depth and complexity to the frame design.

Choosing the Right Wood Species

The choice of wood species significantly influences the appearance and character of your frames. Consider these popular options:

Oak

Oak is a classic choice for picture frames, known for its strength, durability, and rich grain patterns. It comes in various shades, from warm browns to reddish hues, offering versatility in matching different decor styles. Oak's natural beauty and timeless appeal make it a popular choice for both traditional and contemporary frames.

Maple

Maple is a lighter-colored wood, often featuring a warm, honey-like hue. Its smooth, consistent grain makes it ideal for creating elegant and sophisticated frames. Maple is also known for its hardness and durability, ensuring that your frames will last for years to come.

Walnut

Walnut is a luxurious wood, known for its deep, rich brown color and distinctive, swirling grain patterns. Its beauty and sophistication lend a touch of elegance to any frame. Walnut is a popular choice for high-end frames and is often used to create striking statement pieces.

Cherry

Cherry wood boasts a warm reddish-brown hue that deepens with age, giving it a vintage charm. Its smooth, consistent grain and natural beauty make it an excellent choice for both traditional and contemporary frames. Cherry wood frames can add a touch of elegance and sophistication to any space.

Reclaimed Wood

Reclaimed wood, salvaged from old buildings or structures, adds a unique character and eco-friendly appeal to picture frames. Each piece of reclaimed wood carries a story, with knots, imperfections, and variations in color that create one-of-a-kind frames. This sustainable approach aligns with environmentally conscious consumers and adds an authentic touch to your designs.

Creating a Lasting Impression with Finishing Touches

Once you've selected your wood and designed your frame, it's time to add the finishing touches that will truly elevate your creations. These details can make a world of difference in the final appearance and impact of your frames:

Staining and Painting

Staining and painting allow you to customize the color and finish of your frames. Choose colors that complement the artwork you're framing or that match the overall decor style of the space. You can achieve a variety of looks, from natural wood tones to bold, vibrant colors. Consider using distress techniques or applying metallic finishes to add unique depth and texture.

Glazing and Patina Effects

Glazing techniques, using translucent paint or glaze, can create a soft, antique effect on wood frames. Patina effects, achieved through applying a layer of metallic pigments, add a touch of age and sophistication. These finishes enhance the depth and visual interest of your frames, making them more captivating and inviting.

Hardware and Accents

The hardware and accents you choose can add the finishing touch to your wood picture frames. From simple metal clips to ornate brass hinges, the right hardware complements the overall design. Consider incorporating metal accents, like corners or decorative strips, for a more sophisticated look. Don't forget about the back of the frame, where you can add a touch of elegance with velvet backing or personalized labels.

Marketing and Selling Your Unique Frames

Creating stunning, unique wood picture frames is just the first step. To ensure your success, you need to effectively market and sell your creations. Here are some strategies to help you reach your target audience:

Highlight the Uniqueness and Quality

When marketing your frames, emphasize their unique designs, craftsmanship, and the quality of the wood used. Showcase the individuality of each frame, highlighting the stories behind the wood and the care that went into crafting them. Use high-quality photography to capture the details and beauty of your creations.

Target Niche Markets

Instead of trying to appeal to everyone, focus your marketing efforts on specific niche markets. For example, you could target interior designers, art galleries, or consumers interested in sustainable products. By tailoring your marketing messages to these specific audiences, you'll increase your chances of success.

Utilize Online Platforms

Leverage online platforms to reach a wider audience. Create an online shop, showcase your frames on social media, and participate in online marketplaces. These platforms provide valuable opportunities to connect with potential customers and promote your unique creations.

Attend Craft Fairs and Art Shows

Craft fairs and art shows are excellent venues to showcase your wood picture frames in person. These events provide a chance to interact with potential customers, gather feedback, and gain valuable exposure for your brand. Prepare engaging displays and be ready to share your passion for crafting unique and beautiful frames.

In conclusion, unique wood picture frames offer a compelling combination of beauty, durability, and sustainability, making them a highly sought-after product in the home décor market. By embracing innovative designs, experimenting with various wood species, and adding thoughtful finishing touches, you can create frames that truly stand out. With effective marketing and sales strategies, you can build a successful business around your passion for crafting captivating wood picture frames that elevate the art of showcasing precious memories.

Monday, October 21, 2024

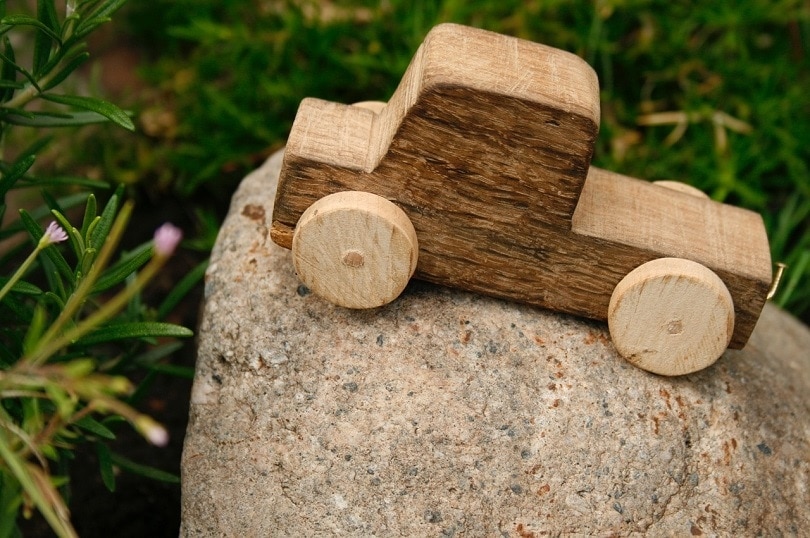
How to Build Wooden Toy Animals, Dolls, and Figurines for Play and Display

How to Build Wooden Toy Animals, Dolls, and Figurines for Play and Display

Crafting Enduring Charm: Building Wooden Toy Animals, Dolls, and Figurines

In a world increasingly dominated by plastic and digital entertainment, there's a growing appreciation for the timeless allure of wooden toys. These handcrafted creations, imbued with the warmth and natural beauty of wood, not only provide delightful play experiences but also serve as cherished keepsakes for generations to come. Building wooden toy animals, dolls, and figurines is a rewarding endeavor that combines artistic expression with practical skills, offering a unique opportunity to create lasting memories and cultivate a connection with nature.

Materials and Tools: A Foundation for Creativity

The foundation of any woodworking project lies in selecting the right materials and tools. When it comes to crafting wooden toys, quality and safety are paramount.

Wood Selection: Embracing the Natural Beauty

For toy construction, hardwoods like maple, cherry, and walnut offer excellent durability and a smooth, appealing finish. Softwoods like pine and cedar are also suitable, particularly for larger pieces, as they are easier to carve and less prone to splintering. Consider the project's size, intended use, and desired aesthetic when choosing wood.

Tools: Empowering Precision and Creativity

Essential tools for building wooden toys include:

  • Hand Saw: For cutting wood to size.
  • Chisels: For shaping and carving details.
  • Sandpaper: For smoothing surfaces and creating a polished finish.
  • Wood Glue: For bonding wood pieces securely.
  • Clamps: For holding pieces together during glue drying.
  • Measuring Tape: For ensuring accuracy in cutting and dimensioning.
  • Pencil: For marking wood.
  • Drill: For making holes for eyes, joints, or other features.
  • Safety Gear: Eye protection, gloves, and a dust mask are essential for woodworking safety.

Building Blocks: Mastering Fundamental Techniques

Once you have your materials and tools, it's time to delve into the fundamentals of building wooden toys. This involves mastering essential techniques that form the basis of any successful project.

Cutting: Precision and Accuracy

Accurate cutting is crucial for creating well-fitting pieces. Whether using a hand saw or a power saw, ensure that the blade is sharp and aligned properly. Measure twice, cut once, and always practice safety precautions when working with saws.

Shaping: Bringing Form to Life

Carving, sanding, and smoothing are essential for giving your toy animal, doll, or figurine its unique form. Start with rough shaping using chisels and progress to finer details with sandpaper. Patience and steady hands are key to achieving a refined aesthetic.

Jointing: Securely Joining Pieces

Jointing techniques are vital for assembling your wooden creations. Common methods include:

  • Mortise and Tenon: A strong joint where a tenon (projection) fits into a mortise (hole).
  • Dovetail: A complex but secure joint that interlocks for a tight fit.
  • Lap Joint: A simple joint where overlapping pieces are glued together.

The choice of joint depends on the design and load-bearing requirements of the toy.

From Imagination to Reality: Creating Wooden Toy Animals, Dolls, and Figurines

With a foundation of materials, tools, and techniques, the exciting process of transforming your ideas into tangible wooden creations begins. Here's a step-by-step guide to building wooden toy animals, dolls, and figurines:

Designing Your Creation: A Blueprint for Success

Start by sketching your desired design. Consider the size, proportions, and features of your toy. Refer to reference images or natural models for inspiration. You can also explore existing toy designs for ideas and inspiration.

Cutting and Shaping the Pieces: Bringing Your Design to Life

Using your design as a guide, carefully cut the wood pieces to the required dimensions. Use a hand saw, band saw, or jigsaw for precise cutting. Once the pieces are cut, begin shaping them with chisels and sandpaper to create the desired form.

Assembling the Pieces: Building a Strong Foundation

Using your chosen jointing techniques, carefully assemble the individual pieces. Apply wood glue generously and clamp the pieces together until the glue dries completely. Ensure that all joints are aligned and secure.

Adding Details and Features: Enhancing the Appeal

Once the main structure is assembled, add details and features that bring your creation to life. Carve facial features, create eyes from wooden beads or paint, and add other decorative elements. Use a drill to create holes for attaching moving parts like legs, arms, or tails.

Finishing Touches: Enhancing Durability and Beauty

Sand the entire toy thoroughly to create a smooth surface and remove any rough edges. Apply a sealant, such as varnish or oil, to protect the wood and enhance its natural beauty. If desired, paint the toy using non-toxic paints and finishes.

The Joy of Play and Display: Cherishing Your Creations

Once your wooden toy animal, doll, or figurine is complete, the real joy begins. These handcrafted creations are not just toys but also works of art that can be cherished for years to come. Here's how to make the most of your creations:

Sharing the Joy of Play: Unleashing Imagination and Creativity

Encourage children to play with your wooden creations. These toys stimulate imagination, creativity, and fine motor skills. The tactile experience of playing with wood helps children develop a sense of wonder and connection with nature.

Preserving the Memories: Displaying Your Creations as Keepsakes

Wooden toys make beautiful decorative accents in homes and nurseries. Display them on shelves, tables, or in shadow boxes. You can even create a special display area dedicated to your handcrafted creations, showcasing your creativity and love for woodworking.

Passing Down the Legacy: Crafting a Family Tradition

Wooden toys can become treasured family heirlooms. They can be passed down from generation to generation, carrying with them the memories and love of the hands that created them. By sharing your craft with family members, you can foster a sense of connection and preserve the tradition of handcrafted toys.

Building wooden toy animals, dolls, and figurines is more than just a hobby. It's a journey of creativity, skill development, and the joy of creating lasting memories. With each piece you craft, you're not only building a toy but also a testament to the enduring power of handcrafted art.