Friday, November 15, 2024

Wooden Magazine Racks That Will Fly Off the Shelves

Wooden Magazine Racks That Will Fly Off the Shelves

Wooden Magazine Racks That Will Fly Off the Shelves

Let's be honest, magazines are making a comeback. They're the perfect way to unwind after a long day, get inspired by beautiful photography, or dive into a fascinating article. But where do you keep them all organized? A beautiful and functional magazine rack is the answer!

Wooden magazine racks are not only practical, but they can also elevate your home decor. They add a touch of warmth and sophistication to any space, and the natural beauty of wood complements a wide range of styles.

So, if you're looking to add a touch of rustic charm to your home or office, keep reading. We're diving into the world of wooden magazine racks and exploring some of the most stunning designs that will make you say "Wow!"

From Classic to Contemporary: Exploring Different Styles

Gone are the days of boring, generic magazine racks. Today's designs are bold, beautiful, and crafted with intention.

Rustic Charm

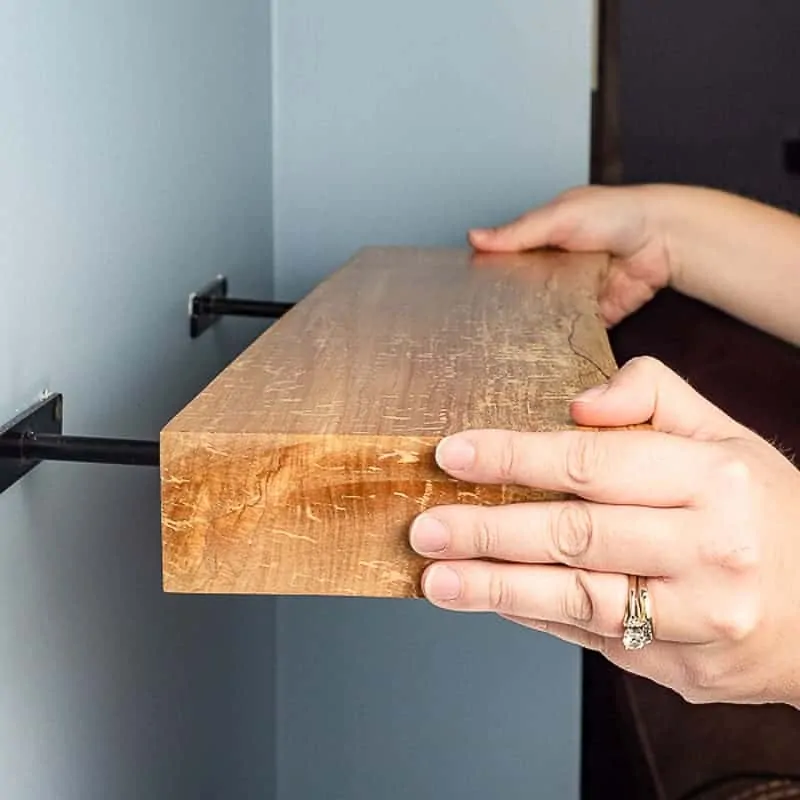
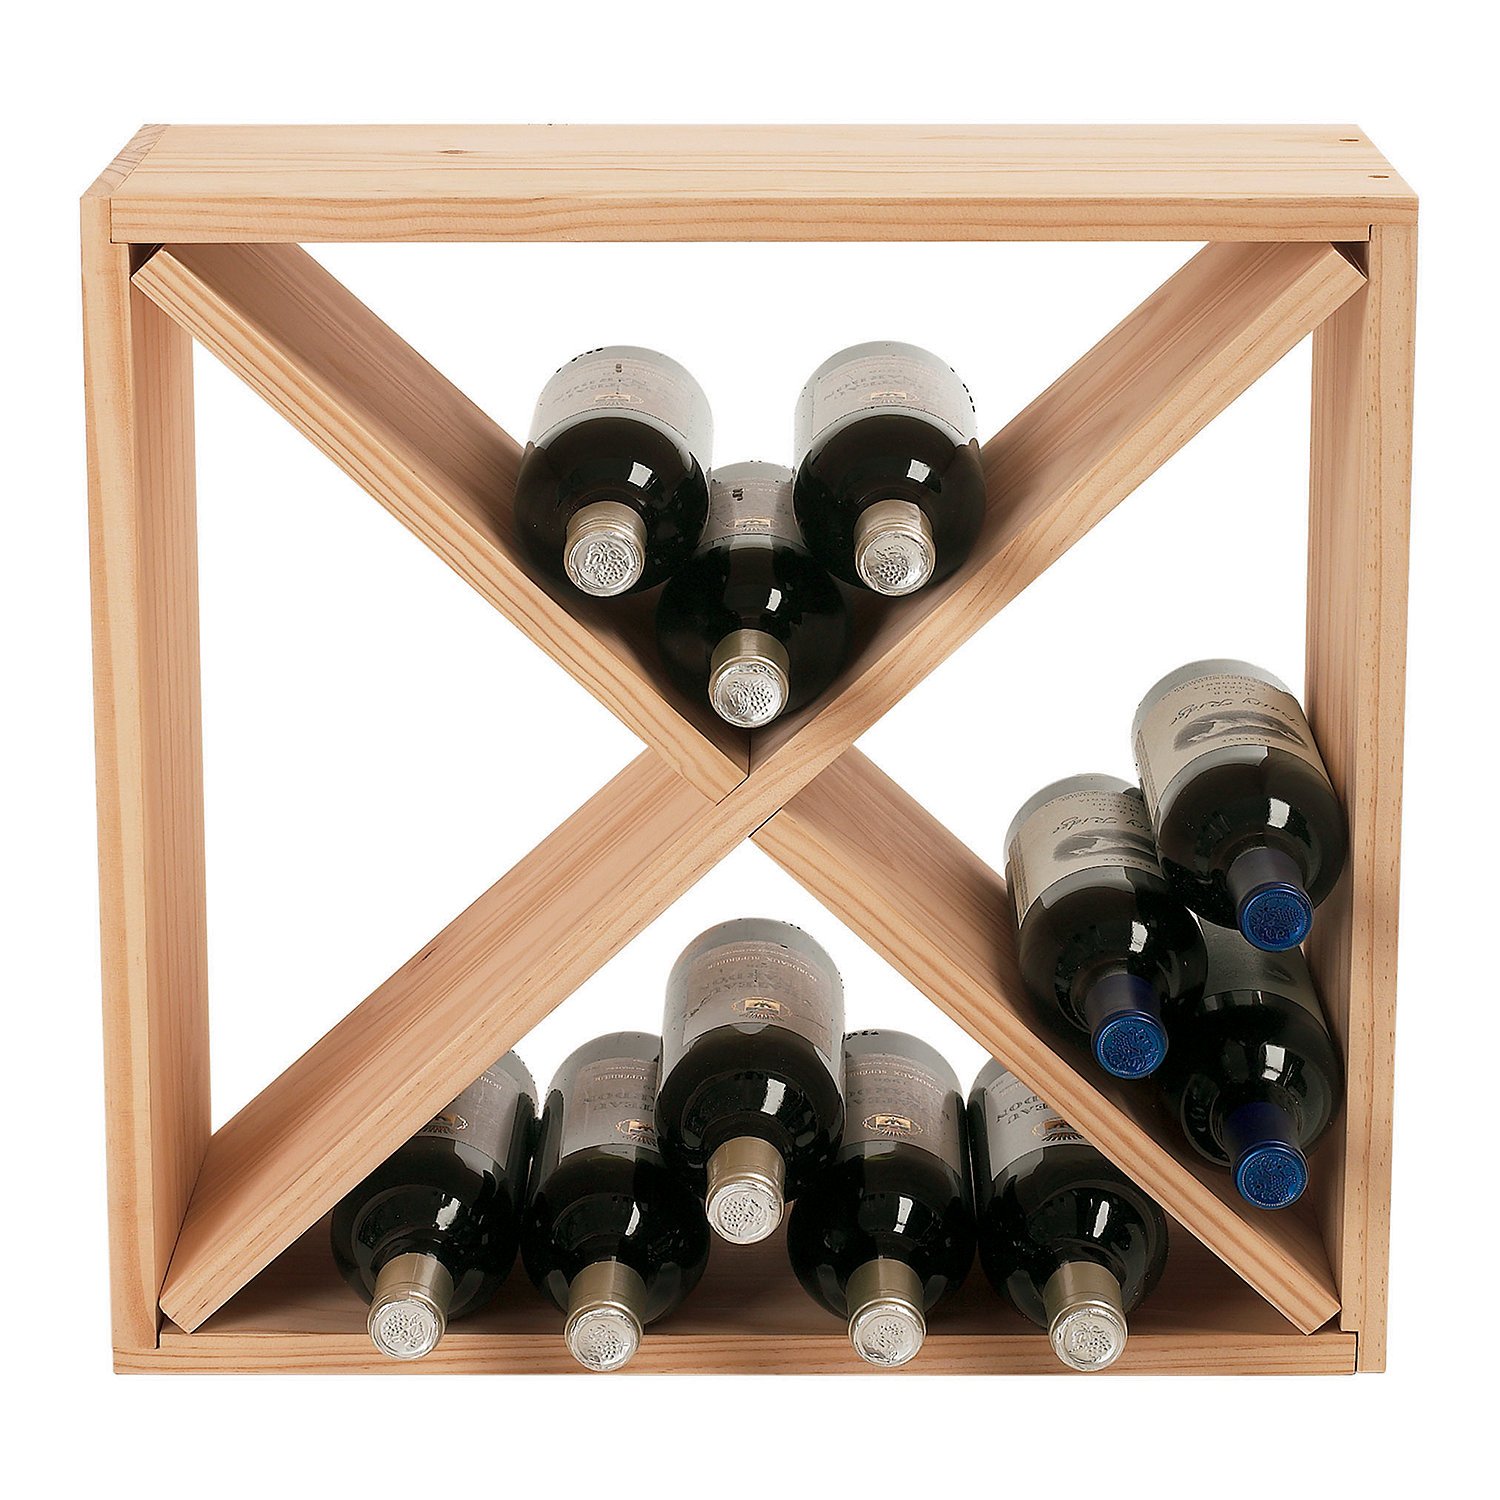
Think reclaimed wood, distressed finishes, and a touch of vintage appeal. These magazine racks create a cozy and inviting atmosphere, perfect for adding a touch of warmth to your living room or den. Look for features like:

  • Unpolished wood with knots and grains that showcase the wood's natural beauty
  • Distressed finishes that give the rack a lived-in look
  • Metal accents like iron or brass for a touch of industrial charm
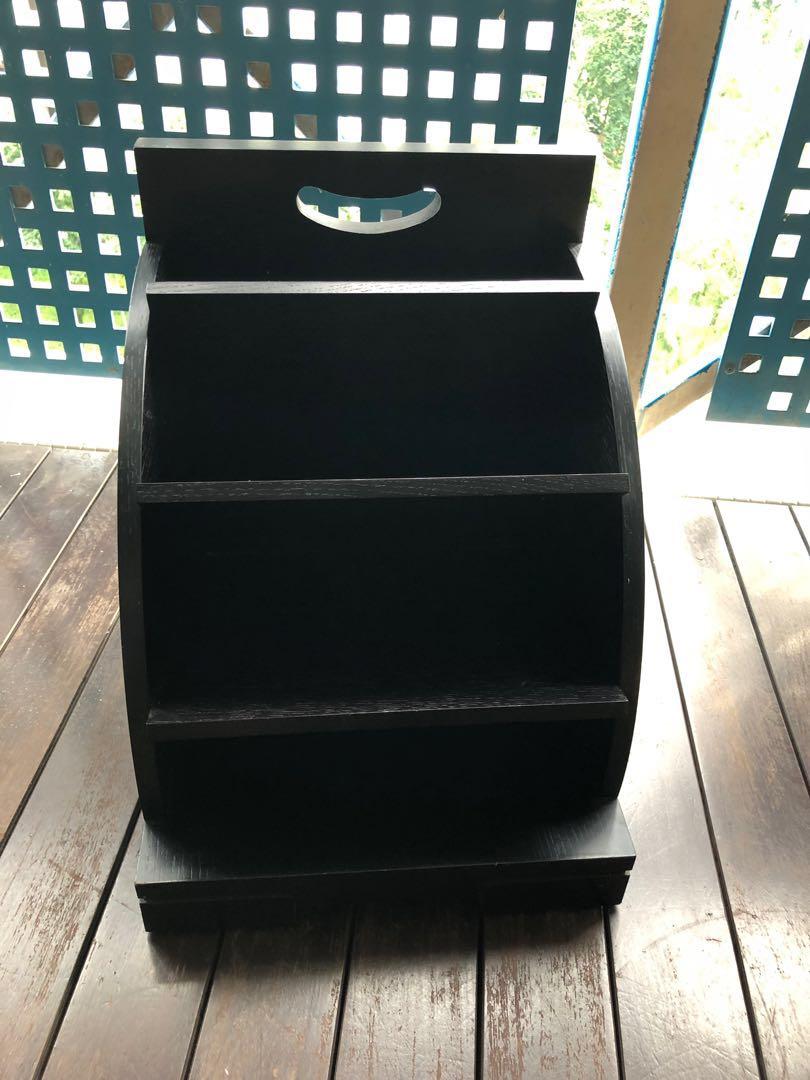
Modern Minimalism

If your style leans towards clean lines, geometric shapes, and a focus on functionality, a modern minimalist magazine rack is perfect for you. Expect:

  • Sleek and simple designs
  • Smooth, polished finishes
  • Materials like walnut or oak that create a sophisticated look

Industrial Chic

Embrace the raw beauty of industrial design with a magazine rack that reflects this aesthetic.

  • Sleek metal frames with wooden shelves
  • Exposed bolts and rivets for a touch of industrial flair
  • A focus on materials like metal and dark-stained wood

Beyond Aesthetics: Choosing the Right Size and Function

While style is important, the size and functionality of your magazine rack should also be top of mind.

Consider Your Space

Think about the area where you plan to place the rack. Do you have a small bookshelf or a spacious entryway? Measure the space before you buy to ensure a perfect fit.

Think About Your Magazine Collection

Are you a magazine hoarder or a minimalist? The size and design of your magazine rack should reflect your reading habits. Choose a rack that can comfortably hold your magazines without feeling overcrowded or too sparse.

Vertical or Horizontal: What's Your Preference?

Vertical magazine racks are ideal for saving floor space and adding a touch of height to a room. Horizontal magazine racks, on the other hand, are perfect for displaying magazines in a more casual and accessible way.

Crafting a Unique Piece: The Charm of DIY

Love working with your hands and unleashing your creativity? Creating your own wooden magazine rack is a rewarding experience. Here's a step-by-step guide to get you started:

Materials You'll Need

  • Wooden boards (consider reclaimed wood for a rustic look)
  • Wood glue
  • Screws and nails
  • Sandpaper
  • Wood stain or paint (optional)
  • Measuring tape
  • Saw
  • Drill
  • Clamps

Instructions

1. **Plan Your Design**: Sketch out your desired magazine rack. Consider the dimensions, the number of shelves, and the overall style.

2. **Cut the Wood:** Use a saw to cut the wood boards to the desired lengths and widths.

3. **Assemble the Rack:** Use wood glue and screws or nails to assemble the sides, shelves, and base of your rack.

4. **Sand and Finish:** Sand the rack smooth and apply a wood stain or paint to achieve your desired finish.

Voila! You've crafted a unique and personalized magazine rack that adds a touch of character to your home.

Finding the Perfect Fit: Where to Buy Wooden Magazine Racks

Ready to bring your magazine organization dreams to life? You'll find a wide variety of wooden magazine racks online and in local stores. Here are a few popular destinations:

  • **Amazon:** A vast selection of wooden magazine racks in various styles and price points.
  • **Etsy:** Support independent artists and makers by exploring their unique and handcrafted magazine racks.
  • **Wayfair:** Find a wide range of styles, from modern to rustic, and enjoy free shipping on many items.
  • **Local furniture stores:** Discover hidden gems and get personalized recommendations from knowledgeable staff.

Frequently Asked Questions

What kind of wood is best for magazine racks?

Hardwoods like oak, walnut, and maple are durable and resistant to scratches and dents. Pine is a more affordable option, but it can be softer and more susceptible to damage.

How do I clean a wooden magazine rack?

Dust your rack regularly with a soft cloth. For deeper cleaning, use a mild soap and water solution, then wipe it dry.

Do I need to seal a wooden magazine rack?

Sealing your rack will help protect it from stains, spills, and moisture. Use a sealant designed for wood and follow the manufacturer's instructions carefully.

There you have it! With a little research and inspiration, you'll find the perfect wooden magazine rack to keep your favorite publications organized and on display. Happy reading!

Affordable Cutting Board Ideas to Start Selling Now

Affordable Cutting Board Ideas to Start Selling Now

Affordable Cutting Board Ideas to Start Selling Now

Looking to add a unique and practical product to your shop or craft fair offerings? Cutting boards are a versatile and timeless item that appeal to a wide audience. The best part? They can be crafted with budget-friendly materials, making them an excellent choice for starting or expanding your business. Let's explore some affordable cutting board ideas that you can start selling today!

Embrace the Charm of Recycled Wood

Giving new life to old materials is not only eco-conscious but also a fantastic way to create characterful cutting boards. Salvage wood from pallets, reclaimed barn wood, or even old furniture. These materials often come with fascinating knots, grain patterns, and a history that adds a unique charm to your pieces.

Tips for Working with Recycled Wood

  • Thoroughly clean and sand the wood to remove dirt, debris, and any potential contaminants.
  • Use a wood sealer to protect the wood from moisture and staining.
  • Consider using a food-safe oil, such as mineral oil, to enhance the wood's natural beauty and provide a protective finish.

Embrace the Simplicity of Butcher Block

Butcher block is a classic choice for cutting boards, known for its durability and attractive grain. You can find butcher block boards in various sizes and thicknesses at hardware stores or online retailers.

Customize Butcher Block for Extra Appeal

  • Create unique shapes by cutting the butcher block into interesting geometric forms or even rounded edges.
  • Add a decorative touch with a simple laser engraving or a hand-painted design.
  • Consider incorporating a built-in handle or groove for juice drainage.

Unleash Your Creativity with Resin Art

Resin art is a trendy and eye-catching technique that can transform simple wood cutting boards into eye-catching masterpieces. Epoxy resin is a durable and transparent material that allows you to create stunning patterns and effects.

Resin Art Tips for Beginners

  • Start with a simple design. Consider incorporating dried flowers, glitter, or metallic pigments into the resin.
  • Use a level surface to ensure the resin sets evenly.
  • Follow the manufacturer's instructions carefully for mixing and curing times.

Beyond the Basics: Expand Your Cutting Board Offerings

Once you've mastered the basics, consider expanding your product line with these creative ideas:

  • Charcuterie Boards: Add a groove to your board for serving crackers and cheese. You can even create a separate area for dipping sauces.
  • Serving Trays: Create larger boards that are perfect for serving snacks, appetizers, or even desserts.
  • Personalized Boards: Offer custom engraving services to add a personal touch to your cutting boards.

Creating affordable cutting boards is a rewarding endeavor that combines creativity, practical skills, and the joy of making something unique. Whether you're a seasoned woodworker or just starting out, these ideas provide a solid foundation for building a successful and fulfilling business.

Outdoor Benches That Will Appeal to Eco-Conscious Buyers

Outdoor Benches That Will Appeal to Eco-Conscious Buyers

Eco-Friendly Outdoor Benches: Bringing Sustainability to Your Backyard

Let's face it, we all love a good outdoor bench. They're perfect for relaxing in the sunshine, enjoying a cup of coffee, or just taking in the view. But what if you could get a bench that was not only comfortable and stylish, but also good for the planet?

That's where eco-friendly outdoor benches come in. Made from sustainable materials and built with the environment in mind, these benches offer a guilt-free way to upgrade your outdoor space. We're here to help you navigate the world of eco-conscious bench options, so you can find the perfect fit for your backyard and your values.

Choosing the Right Materials: Sustainable Options Abound

The beauty of eco-friendly outdoor benches lies in the variety of sustainable materials available. Let's dive into some of the most popular choices:

Recycled Plastic: A Second Life for Plastic Waste

Imagine this: those plastic bottles and containers you recycle get a whole new purpose! Recycled plastic is a fantastic option for outdoor furniture because it's durable, weather-resistant, and low-maintenance. You'll find benches made from a blend of recycled plastic and wood, or even entirely from recycled plastic. They come in various colors and styles, so you can find one that suits your taste.

Sustainable Wood: Forest-Friendly Choices

Wood has always been a classic choice for outdoor furniture, and now there are even more sustainable options available. Look for benches made from certified sustainable wood, which means it comes from forests managed responsibly, ensuring the long-term health of the ecosystem. Some popular sustainable wood choices include:

  • Teak: Naturally durable and resistant to rot, teak is a beautiful option for outdoor furniture. However, choose teak that comes from responsibly managed forests and look for certifications like FSC (Forest Stewardship Council).
  • Cedar: Known for its distinctive aroma and insect-resistant properties, cedar is a great choice for eco-conscious outdoor furniture. Opt for certified cedar for maximum sustainability.
  • Bamboo: A fast-growing and renewable resource, bamboo is a popular eco-friendly alternative to traditional wood. It's lightweight, strong, and naturally resistant to moisture.

Recycled Metal: Giving Old Materials a New Purpose

Metal benches are known for their durability and longevity. But did you know that you can find benches made from recycled metal? This is a fantastic way to reduce the demand for new materials and give old materials a new life. Recycled steel, aluminum, and even repurposed metal pieces can be used to create unique and stylish outdoor benches.

Beyond Materials: Eco-Friendly Considerations

Choosing sustainable materials is a great start, but there are other aspects to consider when selecting an eco-friendly outdoor bench:

Local Sourcing: Supporting Local Businesses and Reducing Transportation Impacts

Look for benches made by local companies or artisans. Sourcing locally helps to reduce transportation emissions and supports the local economy. Plus, you can often find unique and handcrafted pieces with a personal touch.

Durability and Longevity: Reducing Waste Through Long-Lasting Furniture

A durable bench that lasts for years means you'll be replacing it less frequently. This translates to fewer resources used and less waste generated. Look for benches built with high-quality materials and craftsmanship, and consider the warranty offered by the manufacturer.

Sustainable Packaging: Minimizing Packaging Waste

Pay attention to how your bench is packaged. Opt for recycled or recyclable packaging materials, and avoid excessive or unnecessary wrapping. Ask the manufacturer about their packaging practices.

Finding the Perfect Eco-Friendly Outdoor Bench

Now that you know what to look for, where can you find eco-friendly outdoor benches? You can:

  • Shop online: Many online retailers specialize in eco-friendly furniture and products. Look for brands that highlight their sustainability practices.
  • Visit local home improvement stores: Check with your local home improvement stores or garden centers. They often carry a selection of sustainable outdoor furniture.
  • Support local artisans and craftspeople: Find local woodworkers or metalworkers who create unique and eco-friendly benches. Many artists and craftspeople focus on sustainable practices and use reclaimed materials.

Benefits of Choosing Eco-Friendly Outdoor Benches

Going green doesn't have to mean sacrificing style or comfort. Here's why choosing eco-friendly outdoor benches is a win-win:

  • Reduced Environmental Impact: By choosing sustainable materials and minimizing waste, you're helping to protect the environment and reduce your carbon footprint.
  • Enhanced Durability and Longevity: Eco-friendly benches often use high-quality materials and construction methods, leading to longer-lasting furniture and reduced waste over time.
  • Unique Style and Design: With a focus on natural materials and craftsmanship, eco-friendly benches often feature unique designs and finishes that add a touch of character to your outdoor space.
  • Peace of Mind: Knowing that you're making a conscious choice to support sustainability gives you a sense of satisfaction and peace of mind.

Commonly Asked Questions

How much more expensive are eco-friendly outdoor benches?

The price of eco-friendly benches can vary, but they're not necessarily more expensive than traditional benches. You can find affordable options made from recycled materials or sustainably sourced wood. It's all about doing your research and finding the right fit for your budget and needs.

Are eco-friendly outdoor benches as durable as traditional benches?

Absolutely! Many eco-friendly benches are made with high-quality materials and construction methods that ensure durability and longevity. Just make sure to choose benches from reputable manufacturers and consider the warranty offered.

What are the maintenance requirements for eco-friendly outdoor benches?

The maintenance requirements vary depending on the material. Recycled plastic benches are typically low-maintenance, while wood benches may require occasional cleaning and sealing. Be sure to check the manufacturer's care instructions for specific recommendations.

Making a conscious choice to use eco-friendly outdoor benches is a small but impactful step towards a greener future. It's about making choices that benefit both your backyard and the planet. So, go ahead, find the perfect eco-friendly bench that reflects your style and values, and enjoy the peace of mind that comes with making a difference.

Step-by-Step Guide to Wooden Christmas Gifts

Step-by-Step Guide to Wooden Christmas Gifts

A Comprehensive Guide to Crafting Wooden Christmas Gifts

Christmas is a time for giving, and what better way to show your love and appreciation than with a thoughtful and handcrafted gift? Wooden gifts, in particular, possess a timeless charm and a sense of warmth that makes them truly special. They not only serve as beautiful and functional objects but also convey a personal touch that store-bought presents simply cannot match.

This comprehensive guide will delve into the world of wooden Christmas gifts, providing you with everything you need to know to create stunning and unique pieces. From choosing the right wood to finishing techniques, we will cover all aspects of the crafting process, ensuring you have a memorable and fulfilling experience.

Choosing the Perfect Wood

The first step in crafting a wooden Christmas gift is selecting the right wood. Different wood species have unique properties that make them suitable for specific projects. Here's a breakdown of some popular choices:

Hardwoods

  • Oak: Strong, durable, and with a distinctive grain pattern, oak is excellent for furniture, cutting boards, and ornaments.
  • Maple: Known for its beautiful, light-colored wood and smooth texture, maple is ideal for toys, bowls, and decorative items.
  • Cherry: With a rich reddish-brown hue and a fine grain, cherry wood is perfect for boxes, jewelry holders, and picture frames.
  • Walnut: Featuring a dark, elegant color and striking grain patterns, walnut is a luxurious choice for high-end furniture, clocks, and decorative pieces.

Softwoods

  • Pine: A budget-friendly option with a light color and a soft texture, pine is suitable for small crafts, toys, and boxes.
  • Cedar: Known for its pleasant aroma and resistance to insects, cedar is a popular choice for chests, boxes, and outdoor projects.
  • Redwood: A durable and weather-resistant wood with a rich reddish-brown color, redwood is ideal for outdoor furniture, garden structures, and decorative items.

Consider the following factors when choosing your wood:

  • Project type: The intended use of your gift will influence the wood selection. For example, a sturdy cutting board requires hardwood, while a small ornament can be made with softwood.
  • Aesthetic: The color, grain pattern, and overall appearance of the wood will impact the final look of your gift.
  • Availability: Ensure the chosen wood species is readily available in your area or from reputable suppliers.
  • Budget: Different wood species have varying price points. Set a budget beforehand to guide your selection.

Tools and Equipment

Having the right tools and equipment is crucial for crafting high-quality wooden gifts. While the specific requirements may vary depending on your project, here's a list of essentials:

  • Saw: A handsaw, jigsaw, or circular saw will allow you to cut the wood to size.
  • Sandpaper: Various grit sandpaper will help smooth the surfaces and create a polished finish.
  • Chisel: A chisel is used for carving, shaping, and removing excess wood.
  • Drill: A drill with various drill bits is essential for creating holes for screws, dowels, or other attachments.
  • Screwdriver: A screwdriver or a drill driver will be needed for attaching pieces and securing screws.
  • Clamps: Clamps help hold pieces together securely during assembly.
  • Measuring tools: A ruler, tape measure, and protractor are essential for accuracy in cutting and measuring.
  • Safety gear: Always prioritize safety by wearing safety glasses, ear protection, and gloves when working with wood.

Design and Planning

Before diving into the crafting process, it's essential to plan your design. Consider the following points:

  • Recipient's preferences: What are the recipient's interests, hobbies, and style? This will help you tailor the design to their tastes.
  • Functional vs. decorative: Will the gift be a functional item, like a cutting board, or a purely decorative piece, like an ornament? This will determine the shape, size, and details.
  • Complexity: Assess your skill level and choose a design that is appropriate for your abilities. Starting with simple projects and gradually increasing complexity is recommended.
  • Materials and finishing: Consider the types of wood, paint, stain, or other finishing techniques you will use to achieve the desired look.
  • Sketching and blueprints: Draw a detailed sketch or create a blueprint to guide your cutting, shaping, and assembly processes.

Crafting Techniques

The actual crafting process involves various techniques, depending on the project. Here's a general overview:

Cutting and Shaping

  • Sawing: Use the appropriate saw to cut the wood to the required dimensions and shapes.
  • Sanding: Smooth the rough edges and surfaces with progressively finer grit sandpaper.
  • Carving: Use chisels to carve intricate designs, shapes, or details.

Assembly

  • Joining: Use woodworking techniques like dovetail joints, mortise and tenon joints, or simple glue-and-screw methods to assemble pieces securely.
  • Drilling: Drill holes for screws, dowels, or other attachments.
  • Clamping: Securely hold pieces together while glue dries or screws are tightened.

Finishing

  • Sanding: Finalize sanding to achieve a smooth, polished surface.
  • Painting: Apply paint to add color, patterns, or a protective layer.
  • Staining: Use wood stain to enhance the natural beauty of the wood's grain and color.
  • Varnishing: Apply varnish or sealant to protect the wood and provide a glossy or satin finish.

Inspirational Wooden Christmas Gift Ideas

If you're looking for inspiration, here are some ideas for wooden Christmas gifts:

  • Personalized Cutting Boards: Engraved with the recipient's name or a special message, these functional gifts are perfect for cheese lovers and home cooks.
  • Wooden Ornaments: Cut out shapes like stars, hearts, or snowflakes, and decorate them with paint, decoupage, or laser engraving.
  • Picture Frames: Handmade frames are a unique and personalized way to display cherished photos.
  • Jewelry Boxes: Small wooden boxes adorned with decorative elements like carvings, inlays, or paint can be a charming way to store jewelry.
  • Wooden Toys: Create simple toys like blocks, puzzles, or vehicles from safe and non-toxic wood.
  • Personalized Wine Bottle Holders: Hand-crafted bottle holders can be engraved with names, dates, or special messages.
  • Wooden Coasters: These practical gifts come in various shapes and sizes, adding a touch of style to any coffee table.
  • Candlesticks: Unique wooden candlesticks with intricate details can be a beautiful centerpiece for a holiday table.
  • Wooden Serving Trays: Hand-crafted trays with handles can be used for serving food or drinks and make a delightful gift for entertaining enthusiasts.

Final Touches and Presentation

Once your wooden gift is complete, add some finishing touches to make it even more special:

  • Gift wrapping: Wrap the gift in beautiful paper or fabric and tie it with a ribbon or twine.
  • Personalization: Add a handwritten tag with a thoughtful message or a personalized inscription.
  • Gift basket: Combine your wooden gift with other complementary items, such as gourmet food, candles, or holiday decorations.

Crafting wooden Christmas gifts is a rewarding experience that allows you to express your creativity and love for your loved ones. By following this guide, you'll be well on your way to creating stunning and memorable pieces that will be cherished for years to come. Remember, it's the thoughtfulness and effort behind the gift that makes it truly special.

Wooden Christmas Candle Holders: A DIY Guide

Wooden Christmas Candle Holders: A DIY Guide

Wooden Christmas Candle Holders: A DIY Guide

Hey there, crafty friends! Christmas is just around the corner, and you know what that means â€" time to deck the halls! 🎄✨ This year, why not add a personal touch with some beautiful, handmade wooden candle holders? These charming pieces can bring a cozy warmth to your home, and the best part? You can make them yourself! No need to spend a fortune on store-bought decorations when you can create something unique and special with your own two hands. Let's dive into this fun DIY project. We'll be covering everything from choosing the right wood to finishing touches that'll make your candle holders truly stand out.

Getting Started

First things first, let's gather our materials. You'll need:
  • Wooden blocks or planks (consider different sizes and shapes for variety)
  • Saw (for cutting the wood)
  • Sandpaper (different grits for smoothing)
  • Drill with drill bits (for making the candle well)
  • Wood glue or epoxy
  • Paint or stain (optional)
  • Christmas decorations (like pine cones, berries, ribbons, etc.)
  • Candle wax and wicks (for the candle)
  • Safety glasses and gloves (always important!)
Now, let's get creative! The possibilities are endless here. You can use different wood types like pine, oak, or walnut to achieve distinct looks and textures. And don't be afraid to get playful with shapes! You can create simple squares, circles, or even more intricate designs like stars or snowflakes.

Step-by-Step Guide

Ready to make your own wooden candle holders? Let's break it down step by step:

Step 1: Choose your wood

The type of wood you choose will impact both the look and the sturdiness of your candle holders.
  • Pine: This is a softwood that's easy to work with and readily available. It's budget-friendly and has a natural, rustic charm.
  • Oak: This hardwood is known for its durability and rich grain patterns. It adds an elegant touch to any piece.
  • Walnut: This hardwood has beautiful dark brown tones with intricate swirls and patterns. It's luxurious and adds a touch of sophistication.

Step 2: Cut and Shape

Use a saw to cut your wooden blocks or planks to the desired size and shape. Be sure to wear safety glasses and gloves when cutting the wood!
  • For simple candle holders, a square or circular base will work great.
  • For more intricate designs, you might want to use a template or freehand sketch your desired shape.

Step 3: Sanding and Finishing

This step is essential for a smooth and professional finish. Start with coarse-grit sandpaper to remove any rough edges, then gradually transition to finer grits for a smooth surface.
  • Sanding helps to remove imperfections and create a pleasant surface to paint or stain.
  • Be sure to sand in the direction of the wood grain for a consistent finish.

Step 4: Create the Candle Well

Here comes the fun part! We need to make a space for our candle. Using a drill with a drill bit slightly larger than the diameter of your candle, create a hole in the center of your wooden block or plank.
  • Start slowly and gradually increase the depth until you have a comfortable space for your candle.
  • If you're making a multi-tiered candle holder, you can drill multiple holes at different levels.

Step 5: Assemble Multiple Pieces

If you're creating a multi-tiered candle holder, you'll need to attach the different pieces together.
  • Use wood glue or epoxy to securely bond the pieces.
  • Clamp the pieces together until the glue dries completely.

Step 6: Paint or Stain (Optional)

This is your chance to add some personality to your candle holders! Use paint or stain to achieve the desired look.
  • For a rustic look, consider using a natural wood stain or a distressed paint finish.
  • For a festive feel, use vibrant Christmas colors like red, green, or gold.

Step 7: Decorate

This is where your creativity really shines! Add Christmas decorations like pine cones, berries, ribbons, or even miniature snowflakes to give your candle holders a festive flair.
  • You can glue, tie, or even use wire to secure your decorations to the wood.
  • Use a variety of textures and colors for a truly unique look.

Step 8: Make the Candle

If you're making your own candles, now is the time! Melt your candle wax and pour it into your wooden candle holder. Insert the wick and let the wax cool completely.
  • You can use pre-made candles for this step if you prefer.
  • Choose a fragrance that complements your Christmas decor.

Tips and Tricks

Here are some helpful tips to make your DIY wooden candle holders extra special:
  • Use a drill press for more accurate and even holes.
  • Seal your candle holders with a sealant to protect them from water and moisture.
  • Don't forget to consider safety. Always keep candles away from flammable materials and never leave them unattended.
  • Use a candle snuffer to extinguish the candle safely.
  • Get creative! Experiment with different shapes, sizes, and decorations to create candle holders that are truly unique.

Commonly Asked Questions

What kind of wood is best for candle holders?

For candle holders, you'll want to choose a wood that's sturdy and won't easily crack or warp from the heat of the candle. Hardwoods like oak and walnut are great choices, but pine is also a good option if you're looking for a more affordable option.

How do I prevent the wood from burning?

To prevent the wood from burning, it's important to use a candle that is the right size for the hole you've created. Make sure there's enough space between the candle flame and the wood to avoid any contact. You can also use a heat-resistant sealant to protect the wood.

Can I use any type of candle?

It's best to use candles that are specifically designed for use in candle holders. These candles are typically made with a lower melting point and a sturdier wick, which makes them safer for use in wooden holders.

How do I clean my wooden candle holders?

To clean your wooden candle holders, simply wipe them down with a damp cloth. Avoid using harsh chemicals or abrasive cleaners as they can damage the wood.

Happy Crafting!

There you have it! Now you have all the tools and knowledge you need to create some truly unique and beautiful wooden Christmas candle holders. Get those creative juices flowing and enjoy the process of making something special for your holiday decor. Happy crafting, and remember, the most important ingredient is a little bit of Christmas cheer! ✨

Stylish Jewelry Boxes with a Modern or Minimalist Aesthetic

Stylish Jewelry Boxes with a Modern or Minimalist Aesthetic

Elevating Your Jewelry Collection: Stylish Jewelry Boxes with a Modern or Minimalist Aesthetic

Jewelry, a symbol of personal style and cherished memories, deserves a home as elegant and sophisticated as the pieces themselves. While simple storage solutions may suffice, a stylish jewelry box can elevate your collection, transforming it into a curated display. This article explores the world of modern and minimalist jewelry boxes, highlighting their unique designs, materials, and functionality, to help you find the perfect match for your precious pieces and your aesthetic sensibilities.

The Allure of Modern and Minimalist Jewelry Boxes

Modern and minimalist aesthetics, with their clean lines, geometric shapes, and emphasis on functionality, have gained immense popularity in recent years. These design philosophies translate beautifully to jewelry boxes, offering a sense of order, tranquility, and visual appeal. Unlike traditional, ornate jewelry boxes, modern and minimalist designs prioritize simplicity, allowing your jewelry to take center stage.

Key Characteristics of Modern and Minimalist Jewelry Boxes

  • Clean Lines and Geometric Shapes: The absence of excessive ornamentation and the use of straight lines and geometric forms define the modern and minimalist aesthetic.
  • Neutral Color Palettes: Black, white, gray, and various shades of wood are commonly used, creating a serene and sophisticated backdrop for your jewelry.
  • High-Quality Materials: Modern jewelry boxes often feature premium materials like leather, wood, metal, and glass, showcasing a commitment to durability and aesthetic appeal.
  • Functionality: These boxes prioritize organization and practicality, incorporating compartments, dividers, and trays to accommodate different types of jewelry efficiently.
  • Minimalist Details: Subtle accents like leather handles, metal accents, or engraved details add understated elegance without overwhelming the overall design.

Types of Modern and Minimalist Jewelry Boxes

The world of modern and minimalist jewelry boxes offers a diverse range of options to suit different preferences and needs. Here are some popular types:

1. Stackable Boxes

Stackable jewelry boxes provide a modular and space-saving solution, allowing you to customize your storage based on your collection's size. They often feature multiple tiers with compartments and drawers, offering flexibility and organization.

2. Drawers and Compartments

Drawers and compartments are essential features in most modern jewelry boxes. They allow you to categorize and separate your pieces, ensuring each item is easily accessible and protected. The number and size of drawers and compartments will vary depending on the specific box.

3. Mirror-Lined Boxes

Mirror-lined jewelry boxes add a touch of luxury and practicality. The reflective surfaces create a sense of spaciousness and allow for easy viewing of your jewelry.

4. Travel Jewelry Boxes

For the frequent traveler, a compact and stylish travel jewelry box is essential. These boxes are designed for portability and offer secure storage for your most cherished pieces.

Materials and Finishes

Modern and minimalist jewelry boxes are crafted from a wide variety of materials, each offering its unique aesthetic and durability. Some popular choices include:

1. Leather

Leather exudes timeless elegance and adds a touch of warmth to any jewelry box. Its natural texture and patina create a luxurious look and feel.

2. Wood

Wood offers a natural and sustainable option. Different wood species like oak, walnut, and cherry provide unique grains and colors, adding a touch of rustic charm or refined sophistication.

3. Metal

Metal, particularly brushed stainless steel or brass, brings a modern and sleek aesthetic. Its durability and reflective qualities enhance the overall elegance of the box.

4. Acrylic

Acrylic, a transparent plastic, offers a contemporary look and allows you to showcase your jewelry collection. Its lightweight nature makes it ideal for travel jewelry boxes.

Finding the Perfect Jewelry Box

When choosing a modern or minimalist jewelry box, consider the following factors:

1. Size and Capacity

Determine the size and capacity needed to accommodate your entire jewelry collection. Consider the number of rings, necklaces, bracelets, and earrings you own.

2. Functionality and Organization

Evaluate the box's internal compartments, drawers, and dividers to ensure efficient organization and easy access to your jewelry.

3. Material and Finish

Choose a material and finish that complement your existing decor and personal style. Consider the overall aesthetic of your bedroom or dressing area.

4. Budget

Set a realistic budget and explore options within your price range. Remember that a high-quality jewelry box is an investment that can last for years.

Conclusion

A modern or minimalist jewelry box is more than just storage; it's a statement piece that reflects your personal style and enhances the beauty of your cherished collection. By carefully considering your needs, aesthetics, and budget, you can find the perfect box to elevate your jewelry and create a sanctuary for your most prized possessions. Embrace the simplicity and functionality of these designs and let your jewelry shine in an environment that truly reflects its value.

How to Use Floating Shelves to Organize Your Home

How to Use Floating Shelves to Organize Your Home

Unlocking the Power of Floating Shelves: A Guide to Organizing Your Home

Are you tired of cluttered shelves and overflowing drawers? Embrace a more organized and stylish home with the help of floating shelves. These versatile and space-saving solutions offer a plethora of possibilities for displaying your prized possessions, showcasing your personality, and creating a functional and aesthetic haven.

Why Choose Floating Shelves?

Floating shelves, unlike traditional shelves, offer a clean and minimalist look by appearing to float against the wall. They are free from visible brackets or supports, creating a seamless and contemporary feel. Beyond aesthetics, floating shelves provide numerous benefits, including:

  • Space-Saving: Floating shelves eliminate the need for bulky cabinets or bookcases, maximizing floor space and creating an airy ambiance.
  • Versatile Applications: These shelves can be used in virtually any room, from living rooms to bedrooms, kitchens to bathrooms, providing a customizable solution for organizing and displaying items.
  • Easy Installation: With a few simple tools, floating shelves can be installed quickly and easily, making them a perfect DIY project for home improvement enthusiasts.
  • Style Flexibility: Available in a wide range of materials, finishes, and sizes, floating shelves adapt seamlessly to various design aesthetics, whether modern, rustic, or contemporary.

Mastering the Art of Floating Shelf Organization

The key to maximizing the potential of floating shelves lies in strategic organization. Think beyond just placing items haphazardly; instead, cultivate a system that enhances functionality and aesthetics.

Grouping Like Items

Group similar items together to create a visually pleasing and logical organization. For example, on a living room shelf, gather your favorite novels, decorative figurines, or family photos. In a kitchen, group spices, cookbooks, or serving trays. This visual coherence promotes a sense of order and makes finding what you need easier.

Strategic Height and Placement

Consider the height of your shelves and their placement in relation to the room's flow and existing furniture. Lower shelves can be ideal for displaying smaller items or showcasing plants, while higher shelves provide a perfect spot for larger items or artwork. Experiment with different configurations to determine the ideal layout for your needs.

Balancing Functionality and Aesthetics

Striking a balance between functionality and aesthetics is paramount. While organization is crucial, remember to infuse personality and style into your shelf displays. Mix and match textures, colors, and sizes of items to create an engaging and visually appealing composition. Embrace personal accents, such as framed photographs, travel souvenirs, or art prints, to add a unique touch.

Creative Ideas to Elevate Your Home with Floating Shelves

Floating shelves offer endless possibilities for transforming your home into a stylish and functional space. Here are some inspiring ideas to unleash your creativity:

Kitchen Organization

Install floating shelves above the counter for a visually appealing storage solution for spices, cookbooks, or decorative items. This not only saves space but also elevates the kitchen's aesthetics. For a touch of elegance, opt for shelves with a contrasting finish to the kitchen cabinets.

Living Room Display

Floating shelves are perfect for showcasing your favorite artwork, photos, or decorative objects. Create a gallery wall effect by arranging multiple shelves at varying heights. Use these shelves to create a focal point in the room, or add visual interest above a sofa or fireplace.

Bathroom Storage

In the bathroom, utilize floating shelves to store toiletries, towels, or decorative items. Consider opting for waterproof materials like glass or wood with a moisture-resistant finish. For a contemporary look, install shelves with minimalist design elements, creating a clean and sophisticated feel.

Bedroom Nook

Add warmth and functionality to your bedroom by creating a cozy reading nook. Install floating shelves above your bedside table for easy access to books, a reading lamp, or a soothing scented candle. For a more eclectic feel, incorporate shelves with unique textures or shapes to complement your bedroom decor.

Floating shelves are more than just storage solutions; they are opportunities to express your personal style, showcase your treasured belongings, and create a functional and aesthetically pleasing home environment. Embrace the power of floating shelves, and unlock the potential for a more organized and beautiful living space.

Budget-Friendly Wooden Toy Projects That Are Easy to Build and Sell

Budget-Friendly Wooden Toy Projects That Are Easy to Build and Sell

Budget-Friendly Wooden Toy Projects That Are Easy to Build and Sell

In a world increasingly dominated by screens and technology, the appeal of simple, handcrafted wooden toys remains strong. These toys not only offer a tactile and engaging experience for children but also resonate with parents seeking sustainable and eco-friendly alternatives. The best part? Building these toys can be a rewarding and profitable endeavor for anyone with basic woodworking skills and a bit of creativity.

This article explores a selection of budget-friendly wooden toy projects that are easy to build and have a high potential for selling. Whether you're a seasoned woodworker or just starting out, these projects offer a perfect starting point to unleash your creativity and tap into the growing market for handcrafted goods.

Choosing the Right Wood

Selecting the right wood is crucial for building durable and safe toys. Consider these factors:

  • Safety: Choose wood that is free from knots, cracks, and splinters. Avoid using treated lumber as it can contain chemicals harmful to children.
  • Durability: Hardwoods like maple, cherry, and oak are excellent choices for toys that will withstand rough play. Softwoods like pine and cedar are more affordable but might require additional finishing to prevent scratches.
  • Appearance: The natural beauty of wood can enhance the aesthetic appeal of your toys. Choose woods with interesting grain patterns and colors to create visually appealing pieces.

Essential Tools and Materials

To create these budget-friendly wooden toy projects, you'll need a few basic tools and materials, many of which you may already have in your home workshop:

  • Handsaw or circular saw: For cutting wood to size.
  • Measuring tape and pencil: For accurate measurements and marking.
  • Sandpaper: For smoothing out surfaces and edges.
  • Wood glue: For bonding pieces of wood together.
  • Screwdriver and screws: For assembling the toy components.
  • Clamps: To hold pieces of wood together while the glue dries.
  • Paint or stain: To add color and protection to the finished toy.
  • Safety glasses and gloves: To protect your eyes and hands while working with tools.

Easy and Profitable Wooden Toy Project Ideas

1. Wooden Stacking Rings

Stacking rings are a classic toy that encourages hand-eye coordination and problem-solving skills. They are relatively simple to make and can be customized with different colors and patterns.

  • Materials: Wood dowel rods of varying lengths, a drill bit slightly smaller than the dowel rods, wood glue, sandpaper, paint or stain.
  • Instructions: Cut the dowel rods into different lengths to create rings of varying sizes. Drill holes in the center of each ring to create a stacking system. Sand the edges smooth, apply paint or stain, and let dry completely.

2. Wooden Puzzles

Wooden puzzles provide hours of entertainment for children and can be designed in various shapes, sizes, and themes.

  • Materials: Plywood or other thin wood sheets, a jigsaw or scroll saw, wood glue, sandpaper, paint or stain.
  • Instructions: Sketch out your puzzle design on a piece of paper. Transfer the design onto the plywood and cut out the pieces using a jigsaw or scroll saw. Sand the edges, apply paint or stain, and let dry completely.

3. Wooden Toy Cars

Wooden toy cars are both sturdy and aesthetically pleasing. They can be designed as simple vehicles or with intricate details depending on your skill level.

  • Materials: Wood blocks, a scroll saw or jigsaw, wood glue, sandpaper, paint or stain, wheels (can be purchased separately).
  • Instructions: Cut out the body of the car from a piece of wood using a scroll saw or jigsaw. Add details like windows, doors, and wheels. Sand the edges, apply paint or stain, and let dry completely.

4. Wooden Peg Dolls

Peg dolls are versatile toys that can be used for storytelling, pretend play, and even decoration. They are easy to make and can be personalized with different features and outfits.

  • Materials: Wood dowels, a drill bit slightly smaller than the dowel rods, wood glue, sandpaper, paint or stain, fabric scraps, yarn.
  • Instructions: Cut dowel rods into desired lengths for the dolls' bodies. Drill a small hole near the top for the head. Cut out heads from a separate piece of wood and attach them to the bodies using wood glue. Sand the edges, apply paint or stain, and let dry completely. Add details like eyes, hair, and clothes with fabric scraps and yarn.

5. Wooden Building Blocks

Building blocks are timeless classics that encourage creativity and spatial reasoning. They can be made in various shapes and sizes to provide endless building possibilities.

  • Materials: Wood planks, a table saw or hand saw, wood glue, sandpaper, paint or stain.
  • Instructions: Cut the wood planks into desired sizes and shapes for the blocks. Sand the edges, apply paint or stain, and let dry completely. You can create a variety of block shapes like cubes, cylinders, and triangles.

Selling Your Wooden Toys

Once you've created your beautiful wooden toys, it's time to bring them to market. Here are some ways to sell your handcrafted creations:

  • Online Marketplaces: Platforms like Etsy, Amazon Handmade, and Shopify offer a wide reach for selling handcrafted goods. These marketplaces allow you to set up your own shop and showcase your unique products to a global audience.
  • Local Craft Fairs and Markets: Participating in craft fairs and markets is a great way to connect with potential customers in person and generate local buzz. You can showcase your toys, interact directly with buyers, and get valuable feedback.
  • Social Media Marketing: Utilizing platforms like Instagram, Facebook, and Pinterest can effectively promote your wooden toys to a wider audience. Share photos, videos, and behind-the-scenes content to create an engaging brand presence.
  • Local Boutiques and Shops: Contact local stores that carry handcrafted goods and inquire about the possibility of selling your toys through their outlets. This can provide you with a physical retail presence without the hassle of managing your own store.

Marketing Your Wooden Toys

To ensure your wooden toys stand out in a crowded market, effective marketing is essential. Here are some tips to boost your sales:

  • High-Quality Photography: Capture stunning photos of your toys that highlight their craftsmanship, color, and details. Use natural lighting and simple backgrounds to create eye-catching images.
  • Compelling Product Descriptions: Craft detailed descriptions that emphasize the benefits and unique features of your toys. Include information about the wood used, the inspiration behind the design, and the age range it's suitable for.
  • Customer Testimonials: Gather feedback from satisfied customers and display their positive reviews prominently. Positive testimonials add credibility and trust to your brand.
  • Social Media Engagement: Engage with your audience on social media by responding to comments, running contests, and sharing behind-the-scenes content. Build a strong community around your brand and create a sense of connection with your customers.

Conclusion

Building and selling budget-friendly wooden toys can be a rewarding and profitable venture. By selecting the right wood, utilizing basic tools and materials, and implementing creative marketing strategies, you can tap into a growing market for handcrafted goods. With a little effort and creativity, you can bring joy and wonder to children while building a successful business around your passion for woodworking.

How to Add a Wine Rack to Your Kitchen Cabinetry

How to Add a Wine Rack to Your Kitchen Cabinetry

Adding a Wine Rack to Your Kitchen Cabinetry: A Comprehensive Guide

For wine enthusiasts, integrating a dedicated wine rack into their kitchen cabinetry is a dream come true. Not only does it provide a stylish and organized storage solution for your cherished bottles, but it also adds a touch of sophistication to the heart of your home. This comprehensive guide will walk you through the process of adding a wine rack to your existing kitchen cabinetry, from planning and design to installation and finishing touches.

Planning and Design Considerations

Before embarking on your wine rack installation, it's essential to carefully consider your requirements and design preferences. This planning phase will ensure a seamless integration of the rack into your existing kitchen layout.

1. Define Your Wine Collection and Storage Needs

Start by evaluating the size and nature of your wine collection. Are you storing primarily reds, whites, or a mix of both? Consider the number of bottles you intend to store and any special bottles that require specific conditions, such as vintage wines or larger format bottles.

2. Determine the Ideal Location

Choose a location that is easily accessible, well-ventilated, and protected from direct sunlight. Consider factors like proximity to your dining area, the available space within your cabinets, and your preferred aesthetic. Some common locations for wine racks include:

  • Within existing cabinets: This provides discreet storage and maximizes existing space.
  • Above or below countertop cabinets: Creates a dedicated wine display area.
  • In a dedicated wine cellar: Ideal for larger collections and a dedicated space.

3. Select the Right Wine Rack Style and Material

There is a wide variety of wine rack styles and materials available, each with its own advantages and aesthetics.

  • Traditional wine racks: Often made of wood, these racks offer classic elegance and a timeless look. They come in various designs, including single-bottle shelves, tiered racks, and bottle-resting racks.
  • Modern wine racks: Featuring sleek and contemporary designs, often made from metal, glass, or acrylic. These racks can enhance a modern kitchen's minimalist aesthetic.
  • Wall-mounted wine racks: Offer a space-saving option, especially for smaller kitchens. They are available in various materials, including wood, metal, and glass.
  • Built-in wine racks: Offer a seamless integration into your cabinetry and can be customized to perfectly match your kitchen's design.

4. Consider Functionality and Accessibility

Ensure that the wine rack is easy to access and navigate. This is particularly important for heavier bottles or those stored at higher levels. Consider features like bottle-pulling mechanisms, adjustable shelves, and clear visibility for easy identification.

Installation Process: Step-by-Step Guide

Once you have finalized the design and location, it's time to start the installation process. The following steps provide a general guide, but specific instructions may vary based on your chosen rack and cabinetry type.

1. Prepare the Installation Area

Clear the designated area within your cabinet, ensuring sufficient space for the wine rack and any necessary tools. If needed, remove existing shelves or drawers to accommodate the rack's installation.

2. Mount the Wine Rack

Follow the manufacturer's instructions carefully when mounting the wine rack. This may involve using screws, brackets, or adhesive depending on the rack type. Ensure the rack is securely fastened and level.

3. Adjust and Test

Once installed, adjust the rack's shelves or components to ensure proper fit and functionality. Test the rack with a few bottles to confirm stability and accessibility. If necessary, make any adjustments to the rack's positioning or components before fully loading it.

4. Finishing Touches

After installation, complete the finishing touches, such as adding any decorative elements or accessories. You can also add a label holder or drawer organizers to further enhance the functionality of the rack.

Tips for Choosing the Right Wine Rack

With so many options available, choosing the right wine rack for your needs can be overwhelming. Here are some tips to guide your selection:

  • Consider the wine rack's capacity: Determine how many bottles you need to store and choose a rack with sufficient capacity.
  • Think about the rack's style: Select a rack that complements your kitchen's aesthetic and design scheme.
  • Prioritize functionality and accessibility: Ensure the rack is easy to access and allows for proper storage and display of your wine bottles.
  • Look for durable materials: Choose a rack made from high-quality materials that can withstand the weight of the bottles and stand the test of time.
  • Consider your budget: Wine racks range in price, so set a budget and stick to it.

Maintenance and Care

Once your wine rack is installed, maintaining it is crucial for preserving your wine collection and ensuring the longevity of the rack itself.

  • Regular cleaning: Dust the rack regularly with a soft cloth or brush to prevent dust accumulation. Avoid using harsh cleaners or abrasive materials.
  • Check for damage: Periodically inspect the rack for any signs of wear or damage, especially if you are storing heavier bottles. Repair or replace any faulty parts promptly.
  • Maintain appropriate temperature and humidity: Store your wines in a cool, dark, and dry environment. Ideally, the temperature should be between 55°F and 65°F, and humidity should be around 60-70%.

Conclusion

Adding a wine rack to your kitchen cabinetry can transform your storage solution, elevate your kitchen's style, and enhance your wine-loving experience. By following these steps, you can create a functional and aesthetically pleasing space that showcases your wine collection and adds a touch of sophistication to your kitchen. Remember to choose the right rack for your needs, ensure proper installation, and maintain it regularly for optimal results.