Showing posts with label Ideas. Show all posts

Wednesday, October 30, 2024

How to Make Wooden Wall Clocks with a Nautical or Coastal Theme

How to Make Wooden Wall Clocks with a Nautical or Coastal Theme

Crafting Nautical and Coastal-Themed Wooden Wall Clocks

Embark on a creative journey to craft exquisite wooden wall clocks that exude the charm of the nautical and coastal life. These timepieces, crafted with your own hands, will not only adorn your home but also serve as a cherished reminder of your love for the sea. This comprehensive guide will equip you with the necessary knowledge and techniques to embark on this rewarding endeavor.

Choosing the Right Wood

The choice of wood is crucial for both aesthetic appeal and durability. Opt for woods known for their strength, stability, and suitability for carving and finishing. Here are some excellent options:

  • Mahogany: This classic wood offers a rich reddish-brown hue and natural beauty, enhancing the nautical theme.
  • Walnut: With its deep brown color and intricate grain patterns, walnut provides a sophisticated and elegant touch.
  • Oak: Known for its durability and robust character, oak is ideal for rustic coastal designs.
  • Cherry: Its warm reddish-brown tones and smooth finish create a timeless and sophisticated look.
  • Pine: This lightweight wood is easily workable and cost-effective, perfect for beginners.

Design Considerations

Before embarking on the construction, it's essential to conceptualize the design of your nautical or coastal wall clock. Consider the following aspects:

Theme and Style

  • Nautical: Incorporate elements like ship wheels, anchors, ropes, seashells, or compass roses.
  • Coastal: Explore beach-inspired designs featuring seashells, driftwood, lighthouses, or seagulls.
  • Rustic: Emphasize natural wood textures and finishes, with a focus on weathered elements.
  • Modern: Utilize clean lines, geometric shapes, and contemporary color palettes.

Clock Face Design

  • Traditional Roman Numerals: These classic numerals add a touch of elegance and timelessness.
  • Arabic Numerals: Modern and easy to read, Arabic numerals are a versatile choice.
  • Custom Designs: Get creative with unique designs using stencils, stamps, or even woodburning.

Color Palette

  • Blue and White: Evokes the serenity of the ocean and sky.
  • Red, White, and Blue: Celebrates the colors of the American flag.
  • Earthy Tones: Natural hues like browns, greens, and beiges complement coastal themes.
  • Black and White: Creates a striking contrast for a modern or minimalist look.

Tools and Materials

To craft a beautiful wooden wall clock, you'll need the following tools and materials:

  • Wood: Choose your desired wood type and thickness.
  • Saw: A table saw, circular saw, or hand saw for cutting the wood to size.
  • Drill: For creating holes for the clock mechanism and hands.
  • Sandpaper: Various grits for smoothing the wood and creating a polished finish.
  • Clock Mechanism: Includes the movement, hands, and mounting hardware.
  • Wood Glue: For securing the clock face and other components.
  • Wood Stain or Paint: To achieve your desired color and finish.
  • Polyurethane or Wax: For sealing and protecting the wood.
  • Clamps: To hold pieces together during assembly.
  • Measuring Tape: For accurate dimensions and layout.
  • Pencil: For marking and transferring designs.

Construction Steps

Now, let's dive into the step-by-step process of crafting your wooden wall clock:

1. Cutting the Wood

  • Measure and cut the wood for the clock face and any additional components like a frame or decorative elements.
  • Use a saw and a straight edge to ensure precise cuts.
  • Sand the edges to remove any rough spots.

2. Creating the Clock Face

  • If desired, use a stencil or woodburning tool to create a design on the clock face.
  • If using numerals, carefully mark their placement with a pencil.
  • Use a drill and a drill bit slightly smaller than the size of the clock mechanism to create a central hole for mounting.

3. Assembling the Clock

  • If building a frame, assemble it using wood glue and clamps.
  • Once the glue is dry, attach the clock face to the frame or the wood base.
  • Mount the clock mechanism from the back, ensuring the hands align correctly.

4. Finishing and Sealing

  • Sand the entire clock thoroughly to achieve a smooth surface.
  • Apply your chosen wood stain or paint, following the manufacturer's instructions.
  • After the stain or paint dries, apply a sealant like polyurethane or wax for protection.

Adding Nautical and Coastal Details

To elevate your wooden wall clock to a true nautical or coastal masterpiece, incorporate these decorative elements:

  • Carve or Cut Out Nautical Motifs: Anchors, compass roses, seashells, or even a small ship silhouette.
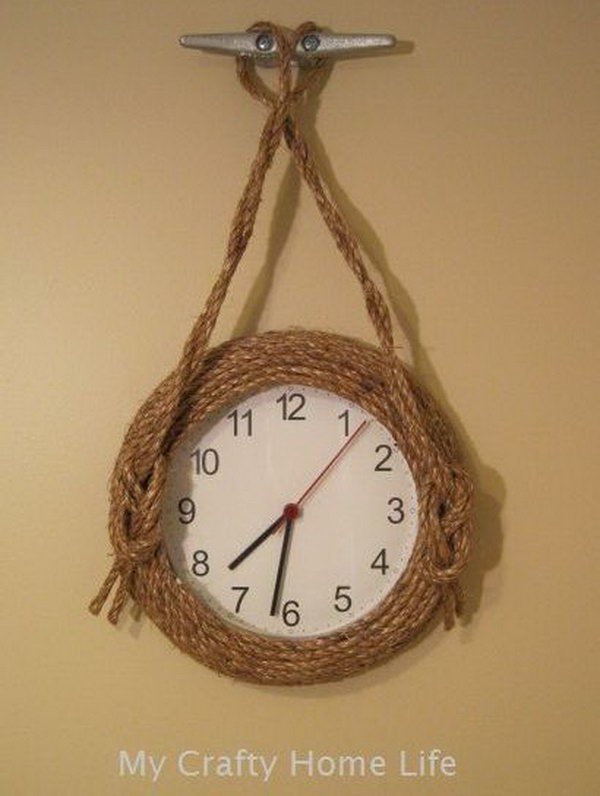
  • Incorporate Rope or Twine: Use rope to create a decorative border around the clock face or as a hanging strap.
  • Add Seashells: Glue seashells around the clock face or on the frame for a beachy touch.
  • Use Driftwood: Incorporate pieces of driftwood for a rustic coastal look.
  • Create a Miniature Lighthouse: Craft a small wooden lighthouse and place it near the clock face.

Unique Ideas for Nautical and Coastal Clocks

Let your creativity flow with these unique ideas:

  • Ship Wheel Clock: Create a clock face resembling a ship's wheel, using wooden spokes and a central hub.
  • Compass Rose Clock: Incorporate a compass rose design into the clock face, representing navigation and exploration.
  • Lighthouse Clock: Design a clock face resembling a lighthouse, using a tall, slender shape and a lantern on top.
  • Seashell Clock: Arrange seashells around the clock face to create a unique and natural design.
  • Driftwood Clock: Use pieces of driftwood to form the clock face and frame, incorporating natural beauty.

Conclusion

Crafting a nautical or coastal-themed wooden wall clock is a rewarding experience that allows you to express your creativity and create a truly unique and personal timepiece. With careful planning, attention to detail, and a passion for the sea, you can transform your woodworking skills into a beautiful and cherished piece of art. Your home will be graced with a distinctive reminder of the beauty and charm of the nautical and coastal life.

Wednesday, October 23, 2024

How to Build Custom Wooden Plant Stands for Extra Income

How to Build Custom Wooden Plant Stands for Extra Income

Crafting Custom Wooden Plant Stands for a Flourishing Side Hustle

In the realm of home decor and gardening, plant stands have emerged as a sought-after element, adding both functionality and aesthetic appeal to indoor and outdoor spaces. Recognizing this growing demand, aspiring entrepreneurs are discovering the lucrative opportunity to create custom wooden plant stands, catering to the diverse tastes and needs of plant enthusiasts. This article delves into the art and business of building custom wooden plant stands, providing a comprehensive guide to help you transform your woodworking skills into a profitable side hustle.

Understanding the Market Demand

The popularity of houseplants and gardening has surged in recent years, fueled by the desire for natural beauty, improved indoor air quality, and a connection with nature. This trend has translated into a thriving market for plant-related accessories, including plant stands. Customers seek unique and personalized designs that complement their existing decor, making custom wooden plant stands highly desirable.

Identifying Your Target Market

Before diving into production, it's essential to identify your target market. Consider the following factors:

  • Style preferences: Are you targeting minimalist, modern, rustic, or bohemian aesthetics?
  • Plant size and types: Will you focus on small succulents or larger, more substantial plants?
  • Budget: What price range are you aiming for?
  • Location: Are you targeting local customers or selling online to a wider audience?

Designing Your Plant Stands

Crafting custom wooden plant stands involves a blend of creativity and technical expertise. You'll need to consider the following design elements:

Functional Considerations

  • Stability: Ensure the stand is sturdy enough to support the weight of the plant and pot.
  • Dimensions: Determine the appropriate height and width based on the intended plant size and placement.
  • Material: Choose suitable wood types, considering durability, aesthetics, and budget.
  • Finish: Opt for a durable and attractive finish that complements the wood and overall design.

Aesthetic Considerations

  • Style: Reflect your target market's preferences in your design choices.
  • Shape: Experiment with geometric shapes, curves, or unique forms.
  • Color: Utilize wood stains, paints, or natural finishes to create desired visual effects.
  • Details: Incorporate decorative elements like carvings, inlays, or metal accents.

Crafting Your Plant Stands

Once you have a solid design in place, it's time to bring your vision to life. Here's a step-by-step guide to building custom wooden plant stands:

Materials and Tools

  • Wood: Select high-quality wood like oak, maple, walnut, or pine, depending on your design and budget.
  • Tools: Basic woodworking tools including a saw, drill, sander, measuring tape, and clamps.
  • Fasteners: Screws, nails, or wood glue for assembling the stand.
  • Finish: Wood stain, paint, varnish, or natural oils for protection and aesthetics.

Construction Process

  1. Cut and shape the wood: Based on your design, cut and shape the wood pieces to create the base, tiers, and any decorative elements.
  2. Assemble the stand: Join the individual pieces using screws, nails, or wood glue, ensuring secure and stable connections.
  3. Sand the surface: Smooth out any rough edges or imperfections for a polished look.
  4. Apply the finish: Choose your preferred finish and apply it evenly, allowing adequate drying time.

Marketing and Selling Your Plant Stands

With your handcrafted plant stands ready, it's time to reach your target market. Consider these marketing strategies:

Online Platforms

  • Etsy: An established marketplace for handmade and vintage goods, allowing you to reach a global audience.
  • Shopify: Create your own online store with customizable themes and payment processing.
  • Social Media: Utilize platforms like Instagram, Facebook, and Pinterest to showcase your creations and engage with potential customers.

Local Marketplaces

  • Craft fairs: Participate in local events to connect directly with customers and showcase your unique designs.
  • Farmers' markets: Find a niche in the growing popularity of gardening and plant-related products.
  • Local boutiques: Partner with shops that carry home decor and gardening items.

Pricing Strategies

When determining the price of your plant stands, consider the following factors:

  • Cost of materials: Factor in the price of wood, fasteners, finishes, and any other supplies.
  • Time invested: Account for the hours spent on design, construction, and finishing.
  • Market competition: Research prices of similar plant stands to ensure competitive pricing.
  • Profit margin: Set a price that allows for a reasonable profit and covers your expenses.

Tips for Success

As you embark on your journey as a custom wooden plant stand builder, consider these tips for success:

  • Continuous learning: Stay updated on woodworking techniques, design trends, and market demands.
  • Customer feedback: Seek feedback from customers to improve your designs and products.
  • High-quality photos: Capture professional photos of your plant stands to showcase their beauty and craftsmanship.
  • Build your brand: Develop a consistent brand identity and message to stand out in the market.
  • Excellent customer service: Respond promptly to inquiries, address customer concerns, and ensure a positive buying experience.

Building custom wooden plant stands can be a rewarding and profitable side hustle, allowing you to unleash your creativity and connect with a passionate market. By understanding the market, mastering the craft, and implementing effective marketing strategies, you can create a thriving business that brings beauty to homes and spaces while growing your income.